
Introduction to Classic Lemon Curd
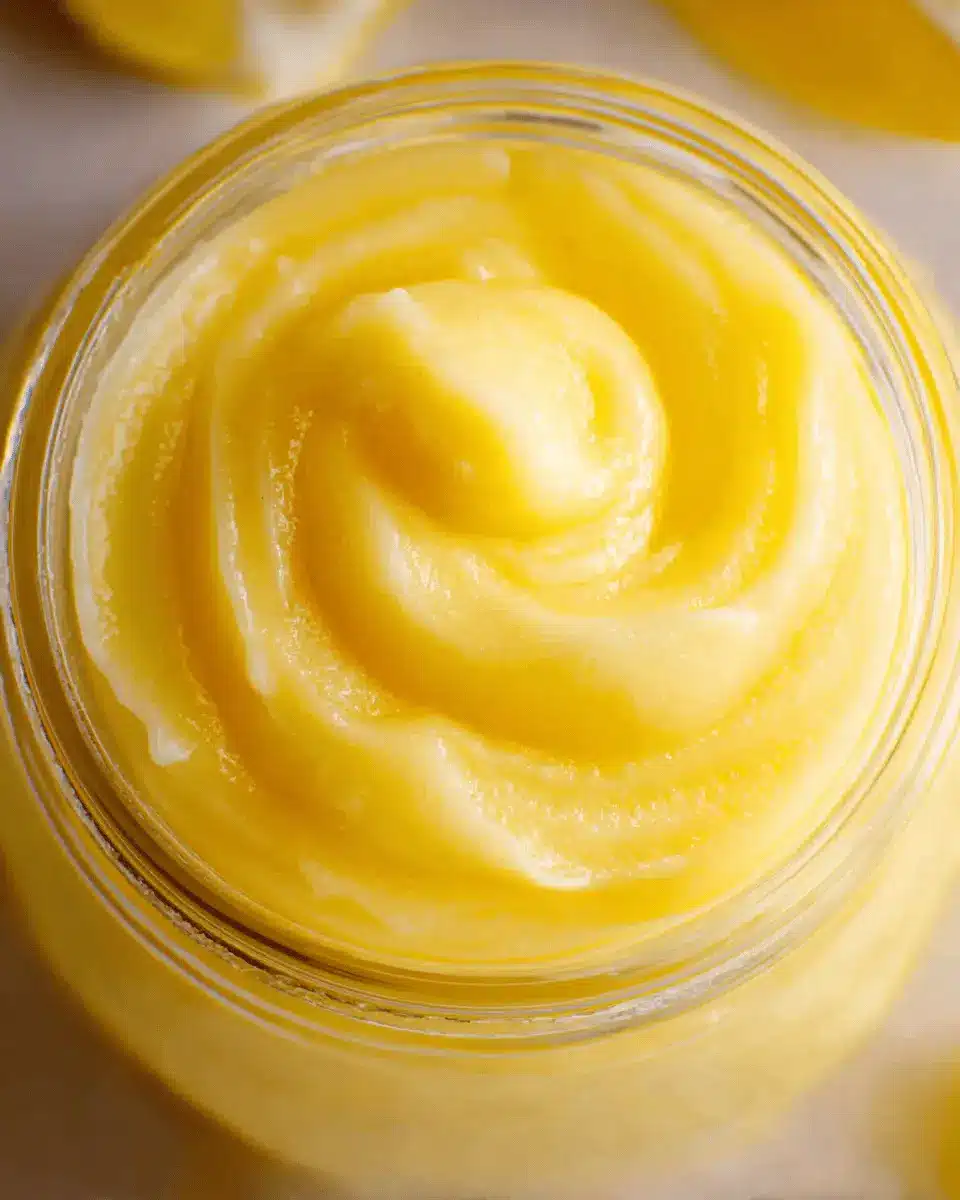
Making your own classic lemon curd at home is an absolute game-changer. Why? Because nothing compares to the bright, zesty flavor of freshly made lemon curd—it’s like sunshine in a jar! Whether you’re spreading it on toast, layering it in a cake, or using it as a filling for pastries, homemade lemon curd elevates any dish into something special.
Why is homemade lemon curd a must-try?
You might be wondering, “Is it worth the effort to make lemon curd myself?” Absolutely! Here are a few reasons to consider:
- Freshness: Store-bought versions often lack the vibrant flavor found in a classic lemon curd made with freshly squeezed lemon juice. The difference is astonishing!
- Quality ingredients: By making lemon curd at home, you have full control over the ingredients. Use organic lemons and high-quality butter for an unbeatable taste.
- Versatility: This sweet and tangy treat can be used in a myriad of ways—from topping your morning yogurt to filling a tart or simply enjoying it with a spoon.
Invest just a little time, and you'll enjoy a delicious homemade lemon curd that you can proudly share. Plus, it’s a fun way to impress friends at your next brunch!
For more ideas on how to use lemon curd, check out Bigger Bolder Baking for inspiration.

Ingredients for Classic Lemon Curd
Essential ingredients for a zesty treat
Making classic lemon curd at home is not only a fun project but also a great way to brighten up your desserts. The beauty of this recipe lies in its simplicity and the quality of its ingredients. Here’s what you’ll need to create the perfect balance of tartness and sweetness:
- 1 cup granulated sugar: This sweet base helps balance the acidity of the lemons and creates a luscious texture.
- ½ cup freshly squeezed lemon juice: Fresh lemons are key! They provide vibrant flavor and essential acidity.
- 4 large egg yolks: Adding richness and creaminess, these yolks contribute to the silky smooth texture of your curd.
- 1 tablespoon finely grated lemon zest: The zest amplifies that zesty lemon flavor, making your curd even more aromatic.
- ½ cup salted butter (cut into pieces): The butter adds a velvety finish, while the salt enhances the overall taste profile.
To dive deeper into the importance of using fresh ingredients, check out this guide on citrus fruits. With these ingredients on hand, you’ll be well on your way to whipping up a delightful classic lemon curd that you can enjoy in numerous ways!
Step-by-step Preparation of Classic Lemon Curd
Making your own classic lemon curd at home is a delightful experience, and it’s easier than you might think! Follow these simple steps for a creamy and zesty result that will elevate anything from scones to cakes.
Gather your supplies
Before you dive into the cooking process, it's essential to have all your ingredients and tools ready. Here’s what you will need:
-
Ingredients:
-
1 cup granulated sugar
-
½ cup freshly squeezed lemon juice
-
4 large egg yolks
-
1 tablespoon finely grated lemon zest
-
½ cup salted butter (cut into 1 tablespoon pieces)
-
Tools:
-
A medium saucepan
-
A heatproof glass bowl
-
A whisk
-
A rubber spatula (optional)
-
Containers for storage
Having everything prepared will make the cooking process smoother and more enjoyable.
Prepare the double boiler setup
To create the perfect environment for cooking your classic lemon curd, you’ll need a double boiler setup. Here’s how to do it:
- Fill a medium saucepan with 1-2 inches of water.
- Bring this water to a gentle boil, then reduce the heat to low so that it maintains a simmer.
- Place a glass bowl on top of the saucepan, ensuring that the bottom of the bowl doesn’t touch the water. This indirect heating method prevents the curd from scorching.
Combine sugar, lemon juice, and egg yolks
Now that your setup is ready, it’s time to mix the main ingredients. In your heatproof bowl, combine:
- Granulated sugar
- Freshly squeezed lemon juice
- Egg yolks
- Lemon zest
Use a whisk to blend everything together until you achieve a smooth mixture. This step is crucial; it ensures that the sugar dissolves well and flavors meld together beautifully.
Whisk and heat to perfection
With your mixture ready, place it on top of your simmering saucepan. Begin whisking constantly; this step is key to achieving a velvety texture:
- Cook while whisking nearly constantly for about 8-10 minutes.
- Keep an eye on the consistency; it should start thickening. If it doesn’t, gently increase the heat to medium-low, still whisking furiously.
Pro tip: The curd is ready when it coats the back of a spoon.
Incorporate butter to achieve creaminess
Once your curd has thickened to perfection, remove it from the heat. It’s time to add that luxurious butter:
- Add your cut pieces of salted butter into the hot curd mixture.
- Whisk until the butter is completely melted and incorporated.
This will give your classic lemon curd that rich, creamy texture we all love.
Cool and store your lemon curd
Now it’s time to cool your lovely creation. Here’s how:
- Transfer your lemon curd into a large bowl or smaller containers.
- For best results, place a piece of plastic wrap directly on top of the curd. Press gently so that the wrap is in contact with the entire surface; this will prevent a skin from forming.
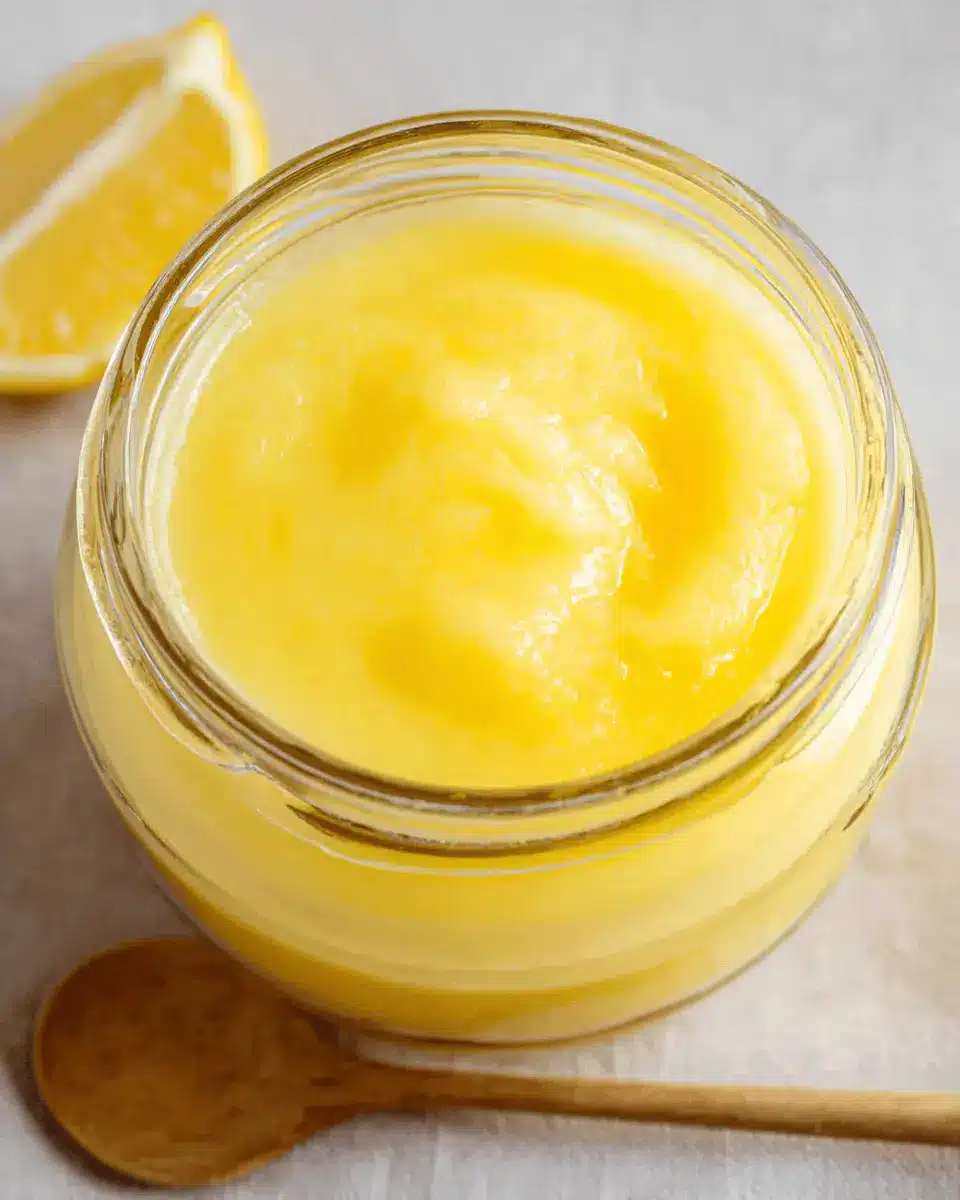
- Let it cool at room temperature, then refrigerate for at least 1-2 hours. As it chills, it will thicken even more.
Your homemade lemon curd can be stored in the refrigerator for up to two weeks or frozen for up to three months. Now, enjoy the sunny burst of flavor in every bite!
Ready to get cooking? This classic lemon curd is the perfect versatile treat for your desserts!
Variations on Classic Lemon Curd
Lemon-lime curd twist
Elevate your classic lemon curd with a zesty lemon-lime combination! Simply substitute half of the lemon juice with fresh lime juice for a refreshing burst of flavor. This variation pairs beautifully with a variety of desserts, from scones to cheesecakes, and adds a cheerful, tangy twist that brightens up any dish.
Raspberry lemon curd blend
For a colorful spin, mix in some pureed raspberries to your classic lemon curd. Start with a cup of fresh or frozen raspberries, and blend them until smooth. Fold this delightful fruit puree into your lemon curd after it cools, ensuring a vibrant pink hue and a luscious raspberry flavor that takes your dessert to the next level. This combo works wonders in tarts or as a topping for pancakes!
Both variations offer unique flavors while keeping the comforting essence of the traditional lemon curd intact. Give them a try and let your taste buds rejoice!
Cooking Tips and Notes for Classic Lemon Curd
Achieving the Right Consistency
To get that perfectly creamy texture in your classic lemon curd, whisk continuously while cooking. This helps prevent lumps and promotes even thickening. If it’s not thickening after 8-10 minutes, don’t hesitate to raise the heat slightly to medium-low. Remember, patience is key, and the curd will thicken more once it cools!
Preventing a Skin from Forming
Nobody wants a skin on their luscious lemon curd! To avoid this, press a piece of plastic wrap directly onto the surface of the curd before refrigerating. This simple step traps moisture and ensures you enjoy that smooth, velvety finish when you dig in.
For more tips on consistency and preservation, visit Serious Eats and learn from the pros!
Serving Suggestions for Classic Lemon Curd
Perfect pairings for a delightful experience
Classic lemon curd shines as a versatile condiment, with its tangy taste complementing a variety of foods. Spread it on warm scones or toast for a delightful breakfast treat. It’s also perfect atop pancakes or waffles for an energizing weekend brunch. Consider pairing it with Greek yogurt and fresh berries for a light yet decadent dessert. For an evening gathering, try serving it alongside shortbread cookies; the buttery crunch matches beautifully with the curd's creaminess.
Creative ways to use lemon curd
Get imaginative with your lemon curd! Incorporate it into your favorite cake or cupcake recipes for a zesty filling. Mix it into whipped cream for an irresistible topping that elevates any dessert. If you enjoy homemade ice cream or gelato, mix classic lemon curd into the batter for a refreshing treat. You can even swirl it into oatmeal or yogurt for an unexpected burst of flavor. The possibilities are endless, making lemon curd a delightful addition to your culinary arsenal. For more creative serving ideas, check out Ghirardelli's tips on incorporating flavors!
Time Breakdown for Classic Lemon Curd
Cooking doesn't have to be a lengthy affair, especially with this classic lemon curd. Here’s how the time stacks up:
Preparation time
Just 5 minutes to gather and mix your ingredients before the cooking begins!
Cooking time
In only 10 minutes, you’ll be cooking over that gentle simmer, whisking your way to a luscious curd.
Total time
Plan for about 2 hours and 15 minutes. This includes cooking time and allowing it to chill, making it perfect for your dessert plans!
Whether you're drizzling it over pancakes or filling pastries, the rich tang of this homemade lemon curd makes every bite unforgettable. Looking for time-saving tips? Check out these kitchen hacks to streamline your cooking process!
Nutritional Facts for Classic Lemon Curd
When indulging in classic lemon curd, it’s essential to understand its nutritional profile, especially if you savor it often. Here’s a quick glance:
Calories
A serving of this delightful treat packs about 153 calories. It’s a luscious addition to any dish, but moderation is key!
Sugar Content
Each serving contains roughly 17 grams of sugar, primarily from the granulated sugar and fresh lemons. Consider this if you're watching your sugar intake!
Fat Content
With approximately 9 grams of fat, this recipe includes rich ingredients like butter—perfect for that creamy texture we all love.
By being mindful of these numbers, you can enjoy your classic lemon curd without compromising your health goals. For a more in-depth look at the benefits of lemon, check out the information provided by Healthline.
FAQs about Classic Lemon Curd
How long can homemade lemon curd be stored?
Homemade classic lemon curd can be stored in the refrigerator for about 1 to 2 weeks. To ensure it remains fresh, keep it in an airtight container. If you find yourself with more than you can eat, consider freezing it! Properly stored, lemon curd can last up to 3 months in the freezer. Just remember to let it thaw in the fridge overnight before using it again.
Can I make lemon curd without eggs?
While traditional lemon curd recipes rely on eggs for that creamy texture, you can try using alternatives like silken tofu or cornstarch mixed with plant-based milk. You can adapt recipes to create a vegan version of lemon curd, but it might not have the same rich taste. For more options, check out vegan cooking blogs like Minimalist Baker for egg-free alternatives.
What’s the best way to use leftover lemon curd?
The versatility of classic lemon curd is one of its best features! Use it as a spread on toast, in yogurt, or even drizzled over pancakes. It's a fantastic filling for pastries, cakes, or tarts, too! If you have some ice cream on hand, topping a scoop with lemon curd can elevate your dessert to a whole new level!
Conclusion on Classic Lemon Curd
Creating classic lemon curd at home is a delightful way to bring vibrant flavors to your dishes. This sweet and tart treat enhances desserts, breakfast items, and even pastry fillings. With simple ingredients and a touch of patience, you’ll savor the satisfaction of enjoying homemade lemon curd.
Why You Should Make This Sweet and Tart Delight at Home!
Making classic lemon curd yourself is rewarding for several reasons:
- Freshness: Homemade lemon curd bursts with vibrant flavor, unlike most store-bought options.
- Customization: Adjust the sweetness or tartness to perfectly suit your taste.
- Versatility: Use it in various desserts, on toast, or as a topping for yogurt and pancakes for a bright breakfast twist.
Plus, it’s surprisingly easy! The skills you gain in this quick recipe open doors to creative culinary adventures. Whether you’re whipping up a batch for yourself or impressing guests, lemon curd is sure to brighten your day. For a fun and informative look at other citrus-based recipes, check out NPR's article on citrus fruits that showcases their health benefits and delicious uses.
Now, grab those lemons and start creating!

Classic Lemon Curd
Equipment
- medium saucepan
- Glass Bowl
Ingredients
Sweetener and Flavor
- 1 cup granulated sugar
- ½ cup freshly squeezed lemon juice highly recommended
- 1 tablespoon finely grated lemon zest
Eggs and Dairy
- 4 large egg yolks
- ½ cup salted butter cut into 1 tablespoon sized pieces
Instructions
Preparation
- Add 1-2" of water to the bottom of a medium saucepan. Bring water to a boil, then reduce heat to low and keep water simmering.
- Place a glass (and heat-proof) bowl on top of the saucepan, so the bottom isn't touching the water.
- To the glass bowl, add sugar, lemon juice, egg yolks, and lemon zest. Whisk to combine well.
- Continue cooking, and whisking nearly constantly for about 8-10 minutes. Curd should be thickening.
- If your lemon curd isn't thickening at all, increase the heat to medium low and continue whisking and cooking.
- Remove pan from heat, then add butter and whisk to melt completely.
- Transfer lemon curd to a large bowl, or smaller containers. Place a piece of plastic wrap directly on top of the curd, pressing very gently so the entire top surface is covered. This prevents a 'skin' from forming on the curd.
- Let curd come to room temperature, then place in the refrigerator for at least 1-2 hours. Once cooled, the plastic wrap can be removed.
- Curd will thicken more as it cools and chills.
- Lemon curd will keep in the refrigerator for 1-2 weeks, or can be frozen for up to 3 months.
Leave a Reply