
Introduction to Strawberry Jam
Making your own strawberry jam is not only a delightful kitchen project but also a way to preserve the essence of summer all year round. Why go the homemade route? For starters, nothing beats the taste of fresh, homemade jam made from ripe, juicy strawberries. By choosing your ingredients, you can customize flavors and control the sweetness to suit your palate.
Using seasonal strawberries not only supports local farmers but also minimizes your environmental impact. Did you know that according to the USDA, home canning can be a great way to reduce food waste while saving money? By using berries on the verge of spoiling or those slightly past their prime, you're doing your part in sustainability.
Homemade jam can also serve as a fantastic gift idea! A jar filled with vibrant strawberry jam is both personal and thoughtful, especially for friends and family who appreciate the craft of cooking. Plus, it gives you a chance to show off your culinary skills!
So, whether you're preparing a breakfast spread or looking for a unique way to enjoy your strawberries, our easy strawberry jam recipe is the perfect place to start. Gather your ingredients, roll up your sleeves, and let’s get started!
Ingredients for Strawberry Jam
When it comes to making delicious strawberry jam, using the right ingredients is key to achieving that perfect balance of sweetness and tartness. Let’s take a closer look at what you need:
Essential Ingredients for Perfect Jam
-
Strawberries: 2 lbs (900g) of fresh strawberries are the star of the show! Choose ripe, juicy ones that are rich in color and have a lovely fragrance. These attributes ensure that your jam is bursting with flavor.
-
Granulated Sugar: 1¼ cups (250g) is what you’ll need to bring out the natural sweetness of the strawberries. Sugar also acts as a preservative, aiding in the jam's longevity.
-
Lemon Juice: 2 tablespoons (30mL) of freshly squeezed lemon juice not only enhances the flavor but also helps in preserving the vibrant color of your jam. The citrus notes balance the sweetness perfectly.
For more tips on selecting quality strawberries, consider visiting California Strawberry Commission. Happy jam-making!
Preparing Strawberry Jam
Making strawberry jam is not only a delightful way to preserve the sweet, luscious taste of strawberries, but it also fills your kitchen with a captivating aroma that signals summer. Let’s break down the process into easy-to-follow steps, ensuring that you’ll end up with jars of homemade jam that you can enjoy or share with friends.
Selecting and prepping the strawberries
First things first—it's all about selecting the right strawberries. Look for vibrant red, fragrant berries that are just slightly overripe; they’ll pack a flavorful punch for your jam. Gently wash them to remove any dirt, then hull and roughly chop. If you’re wondering what to do with strawberries that are slightly too soft, they’re perfect for jam! However, be sure to discard any berries that show signs of mold or decay (More on selecting strawberries).
Mixing strawberries, sugar, and lemon juice
In a large pot, combine your chopped strawberries, granulated sugar, and fresh lemon juice. The lemon juice is not just for tang; it helps preserve the jam's bright color and adds a zesty flavor. Stir the mixture to ensure every berry is coated in sugar, which will draw out the juices and start that delicious syrupy process.
Heating the mixture
Place the pot over medium-high heat. As the strawberries heat, stir frequently to prevent sticking. Bring the mixture to a boil—this is where the magic begins! Keep a close eye on it; if it’s bubbling too fiercely, lower the heat to avoid overflow.
Simmering the jam to perfection
Once you’ve reached a good boil, reduce the heat to medium-low. Allow the jam to simmer for about 45 minutes. Stir occasionally, enjoying the sweet aroma wafting through your kitchen. You'll know it’s time to check the thickness when it’s glossy and syrupy, hitting around 220°F on a candy thermometer.
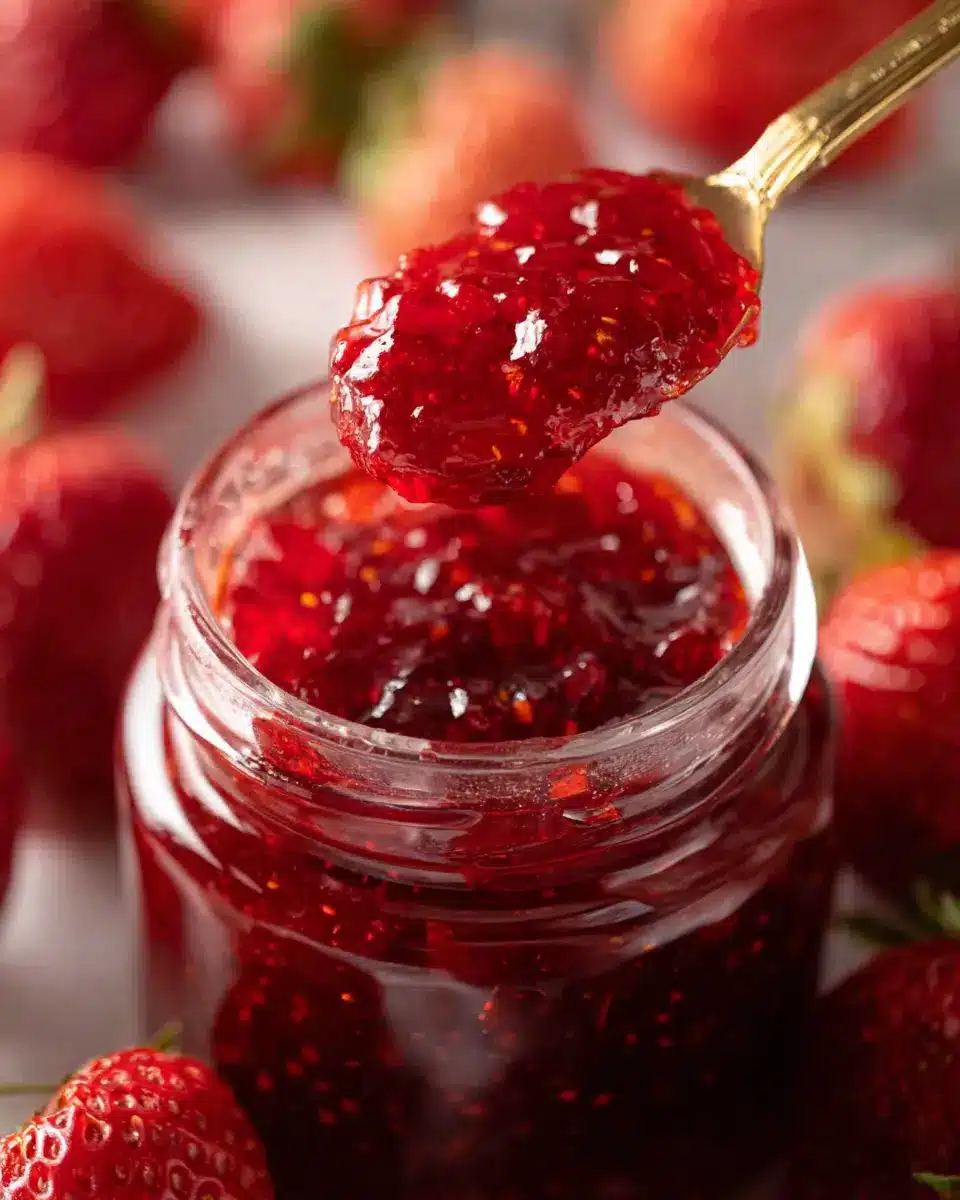
Testing the consistency
To ensure that your strawberry jam is just right, perform the "freezing plate test." Place a small drop of jam on a plate and freeze it for a couple of minutes. If it’s thickened to your liking, it’s ready for the next step. If not, let it simmer a bit longer until it reaches the desired consistency.
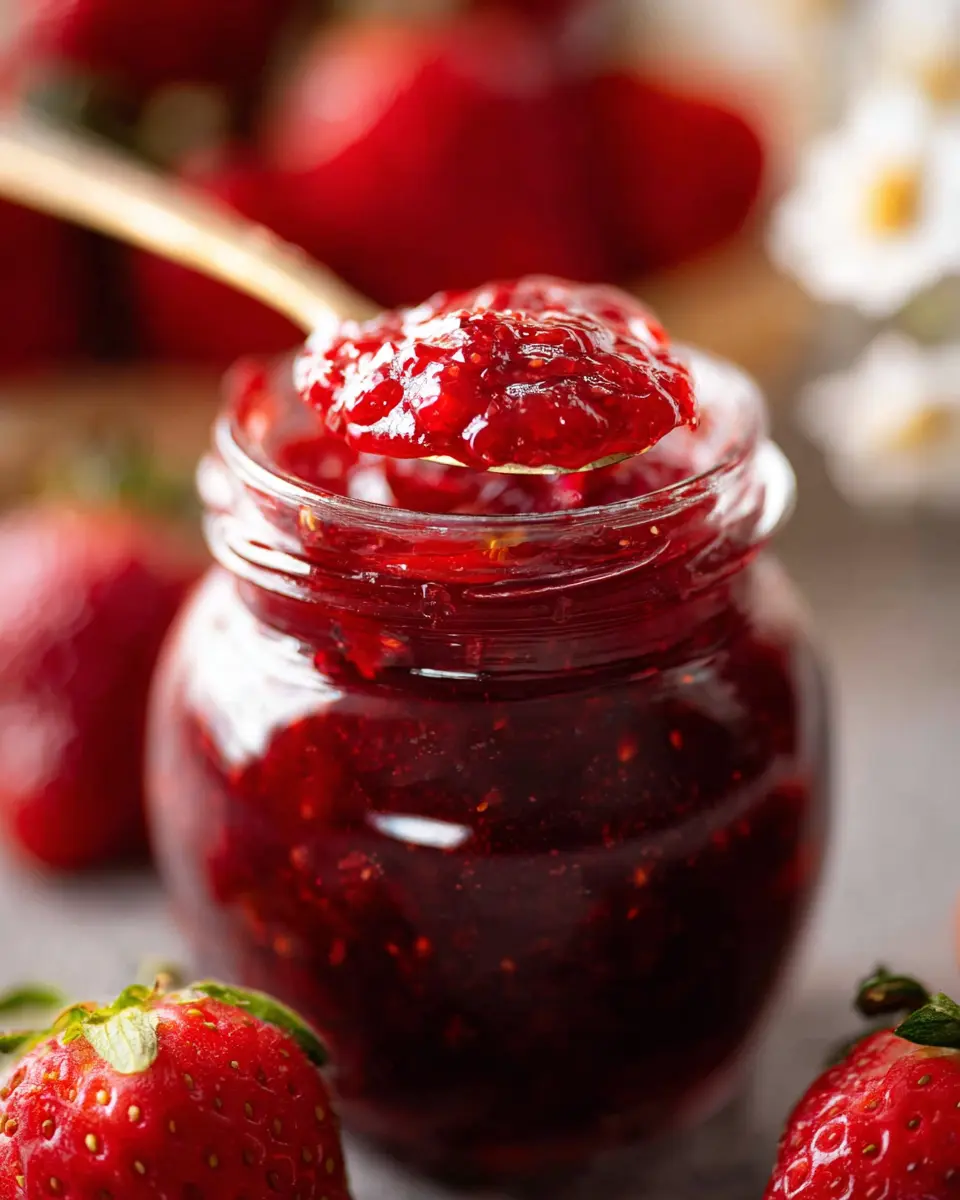
Storing the jam in jars
When it's done, ladle the hot jam into sterilized mason jars. Handle with care, as the contents will be very hot. Seal the jars and allow them to cool completely before refrigerating. Your homemade jam will keep in the fridge for several weeks or can be processed for long-term storage.
Enjoy spreading your delectable strawberry jam on toast, scones, or even drizzled over pancakes for a simple breakfast treat! Making your own jam is a rewarding experience, and you’ll be savoring the taste of strawberries long after the season is over.

Variations on Strawberry Jam
Strawberry jam is a classic favorite, but you can easily elevate it with unique flavors that cater to your taste! Let’s explore some delightful variations.
Lemon-infused Strawberry Jam
For a zesty kick, try adding the juice and zest of a lemon to your strawberry jam. The citrus brightens the flavor, balancing the sweetness of the strawberries with a refreshing tartness. This addition is perfect for summer spreads or a morning toast!
Herbal Strawberry Jam
Looking for a twist on your traditional jam? Introduce fresh herbs like basil, mint, or thyme just minutes before the jam finishes cooking. The herbaceous notes add an unexpected dimension that pairs beautifully with cheese or yogurt.
Floral Strawberry Jam
For a fragrant, romantic touch, consider incorporating a splash of rose water or lavender. These delicate flavors can create a lovely, aromatic strawberry jam that's perfect as a gift or for special occasions. Remember, less is more!
With these variations, you can truly personalize your strawberry jam experience! Which one will you try first?
Cooking Tips and Notes on Strawberry Jam
Importance of Stirring Frequently
Stirring strawberry jam consistently throughout the cooking process is essential. It not only prevents the jam from burning but also helps in achieving an even consistency. A long-handled wooden or silicone spoon works wonders, allowing you to stir without getting too close to the bubbling mixture.
Techniques for Breaking Down Larger Fruit Pieces
If you encounter larger strawberry pieces while cooking, don’t fret! Use a potato masher to break them down to your preferred texture. For an ultra-smooth jam, give the fresh berries a quick pulse in a food processor before cooking — easy and effective!
Sterilizing Jam Jars for Longevity
To ensure your strawberry jam stays fresh longer, sterilizing the jars is a must. Either run them through your dishwasher's sterilize setting or submerge them in boiling water for about 15 minutes. This simple step reduces the risk of bacteria and helps preserve that delightful flavor. For further insights, check out The National Center for Home Food Preservation.
Serving suggestions for Strawberry Jam
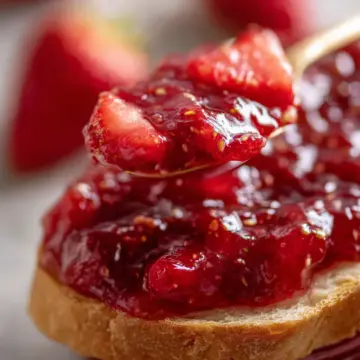
Spread on fresh bread
One of the simplest yet most satisfying ways to enjoy strawberry jam is by spreading it generously on freshly baked bread. Whether it’s a warm baguette, artisanal sourdough, or soft brioche, the contrast of textures and flavors is unbeatable. For a delightful twist, try serving it on toast topped with a smear of cream cheese or a dollop of Greek yogurt.
Use in desserts and baking
Get creative in the kitchen by incorporating strawberry jam into your favorite desserts. Swirl it into yogurt, fill pastries, or layer it in cakes for a burst of fruity flavor. Homemade ice cream or pancakes topped with warm jam will elevate your breakfast to a whole new level of deliciousness.
Pairing with cheeses
Surprisingly, strawberry jam can be an excellent accompaniment to a cheese board. Pair it with creamy brie or tangy goat cheese for an impressive appetizer. The sweet and tart notes of the jam harmonize beautifully with rich cheeses, making it a crowd-pleasing addition to any gathering. For more cheese pairing ideas, check out resources from the California Milk Advisory Board.
Take these suggestions and enjoy your homemade strawberry jam in delightful new ways!
Time breakdown for Strawberry Jam
Preparation time
Getting everything ready for your homemade strawberry jam takes about 15 minutes. This includes washing and hulling those lovely strawberries and chopping them up so they’re ready to cook.
Cooking time
The actual cooking process will take around 45 minutes. You'll want to keep an eye on it and stir frequently to prevent sticking while that sweet mixture thickens beautifully.
Total time
In total, plan for about 1 hour to make this delightful strawberry jam, plus some time for it to chill overnight in the fridge. It’s worth the patience!
Nutritional Facts for Strawberry Jam
Calories per serving
A single tablespoon of strawberry jam packs about 37 calories. It's a delightful way to sweeten your morning toast without going overboard on calories.
Sugar content
In each tablespoon, you'll find around 9.3 grams of sugar. While this adds to the sweetness, it's important to enjoy it in moderation—consider how this fits into your overall daily sugar intake.
Vitamin C benefits
Strawberry jam isn’t just delicious; it also provides about 6.6 mg of vitamin C per serving. This essential nutrient supports your immune system and promotes healthy skin, making your breakfast not just tasty but beneficial too! For more on the health benefits of strawberries, check out WebMD.
FAQs about Strawberry Jam
How long does homemade strawberry jam last?
Homemade strawberry jam can last for about 1 year in the pantry if properly sealed and stored. If you keep it in the refrigerator after opening, it should maintain its freshness for about 3 to 4 weeks. For the best flavor and texture, be sure to use sterilized jars when storing to keep the ingredients safe from bacteria!
Can I make strawberry jam without pectin?
Absolutely! You can create delicious strawberry jam without pectin by naturally relying on the natural pectin present in the strawberries. Just make sure to use an adequate amount of sugar, as it helps with the thickening process. Plus, this method will enhance the fruity flavor of the jam.
What can I use if I don’t have a candy thermometer?
If you don't have a candy thermometer handy, you can conduct the "plate test." Simply place a small drop of jam on a cold plate, chill it for a minute in the freezer, then check the consistency. If it's thick enough to hold its shape, your strawberry jam is ready!
Conclusion on Strawberry Jam
Making your own strawberry jam is not just a rewarding kitchen project, but it also allows you to control the flavors and ingredients. Enjoy the vibrant taste of fresh strawberries on your favorite toast or scones. Homemade jam is perfect for gifting or simply savoring at home!
For more inspirations and tips on canning and preserving, check out this guide on food preservation and elevate your cooking game!
Strawberry Jam
Equipment
- large pot
- Mason jar
- potato masher
- Candy thermometer
- Long-handle non-metal spoon
Ingredients
Fruits
- 2 lbs strawberries halved
Sweeteners
- 1.25 cups granulated sugar 250g
Acid
- 2 tablespoon lemon juice 30mL
Instructions
Cooking Instructions
- Prep the strawberries by washing, hulling, and roughly chopping.
- Add the chopped strawberries, sugar, and lemon juice to a large pot. Place over medium-high heat.
- Stirring frequently, bring the berries to a boil. Reduce the heat to medium-low to keep the berries at a simmer.
- Let the jam simmer for about 45 minutes, frequently stirring, until thick and reaching 220F.
- Check readiness by adding a small drop to a frozen plate. Adjust consistency as desired.
- When done, pour the jam into a mason jar and chill overnight.
- Serve on french bread or scones.


Leave a Reply