
Introduction to Refrigerator Pickled Vegetables
Are you a young professional juggling work deadlines and social plans? If so, you might be looking for convenient ways to eat healthy without sacrificing flavor. Enter refrigerator pickled vegetables! This quick and easy method allows you to preserve fresh produce while adding a burst of flavor to your meals. Best of all, you skip the lengthy canning process typically associated with pickling.
Imagine reaching into your fridge for a vibrant jar of crisp carrots and beets to top your salad or enhance a sandwich. It's a game changer for meal prep! By pickling at home, you not only control what's in your food but also save money and reduce food waste.
Why should you give pickling a shot? According to nutrition experts, pickling veggies can significantly boost your intake of probiotics and antioxidants—benefits that support gut health. Plus, with just a few ingredients and minimal effort, you'll have delightful, tangy additions to your meals that can last up to three months in your fridge!
If you're wondering how to get started, keep reading for a flavorful recipe that will make your taste buds sing and your fridge sparkle with color.
For more about the benefits of pickling and preserving, check out Healthline's article on probiotics and Food & Wine's guide to pickling.
Ingredients for Refrigerator Pickled Vegetables
Refrigerator pickled vegetables are a delightful way to elevate your meals while minimizing waste. Here’s what you need to get started!
Essential ingredients for pickling success
To achieve that perfect balance of briny and sweet, gather these key ingredients:
- Vinegar: 3 cups (half apple cider vinegar and half white vinegar)
- Water: 2 cups
- Kosher salt: 2 tablespoons
- Sugar: 1 tablespoon (add a second if you like it sweeter)
- Garlic: 6 cloves, smashed
- Bay leaves: 4 for depth of flavor
- Thyme sprigs: 4, fresh works best
- Coriander seeds: 3 tablespoons for a fragrant kick
- Black peppercorns: 3 tablespoons for a slight heat
These components are crucial for achieving that crunchy and tangy pickled goodness.
Optional add-ins for flavor enhancement
Feel free to get creative! Consider adding:
- Chili flakes for a spicy twist
- Caraway seeds for a unique flavor profile
- Fresh dill to enhance the herbaceous notes
- Sliced onions or bell peppers for color and additional texture
Incorporating these optional ingredients allows you to tailor your refrigerator pickled vegetables to your personal taste! Who doesn’t love a bit of customization in their snacks? For more tips on enhancing your pickle recipes, check out this guide to pickling spices. Happy pickling!
Preparing Refrigerator Pickled Vegetables
Creating refrigerator pickled vegetables at home is not just a fun kitchen project; it's a way to elevate your meals with vibrant flavors and crunch while preserving seasonal produce. Let’s walk through the process together, ensuring it’s simple and enjoyable!
Step 1: Gather your pickling equipment
Before diving into the delightful realm of pickling, it’s essential to gather your tools to make the process smooth. Here’s what you’ll need:
- Glass Jars: Aim for pint-sized jars; they’re perfect for storing your creations.
- Saucepan: A medium-sized one will do just fine for your pickling liquid.
- Measuring Tools: A standard set of measuring cups and spoons will help you get the right ratios.
Having everything on hand will save you time and energy, making the experience much more enjoyable. For some inspiration, check out Ball Canning for quality canning equipment.
Step 2: Prepare the pickling liquid
Now, let’s create the star of the show—your pickling liquid! Start by combining the following in your saucepan:
- 3 cups vinegar (a mix of apple cider and white vinegar works wonders)
- 2 cups water
- 2 tablespoons kosher salt
- 1 tablespoon sugar (or more, if you like it sweeter)
- Your choice of spices (think garlic, bay leaves, thyme, coriander seeds, and black peppercorns)
Bring this mixture to a simmer over medium heat. Stir occasionally until the salt and sugar dissolve. Once simmering, remove it from heat and let it cool slightly. This liquid will infuse your refrigerator pickled vegetables with a burst of flavor that you’ll love.
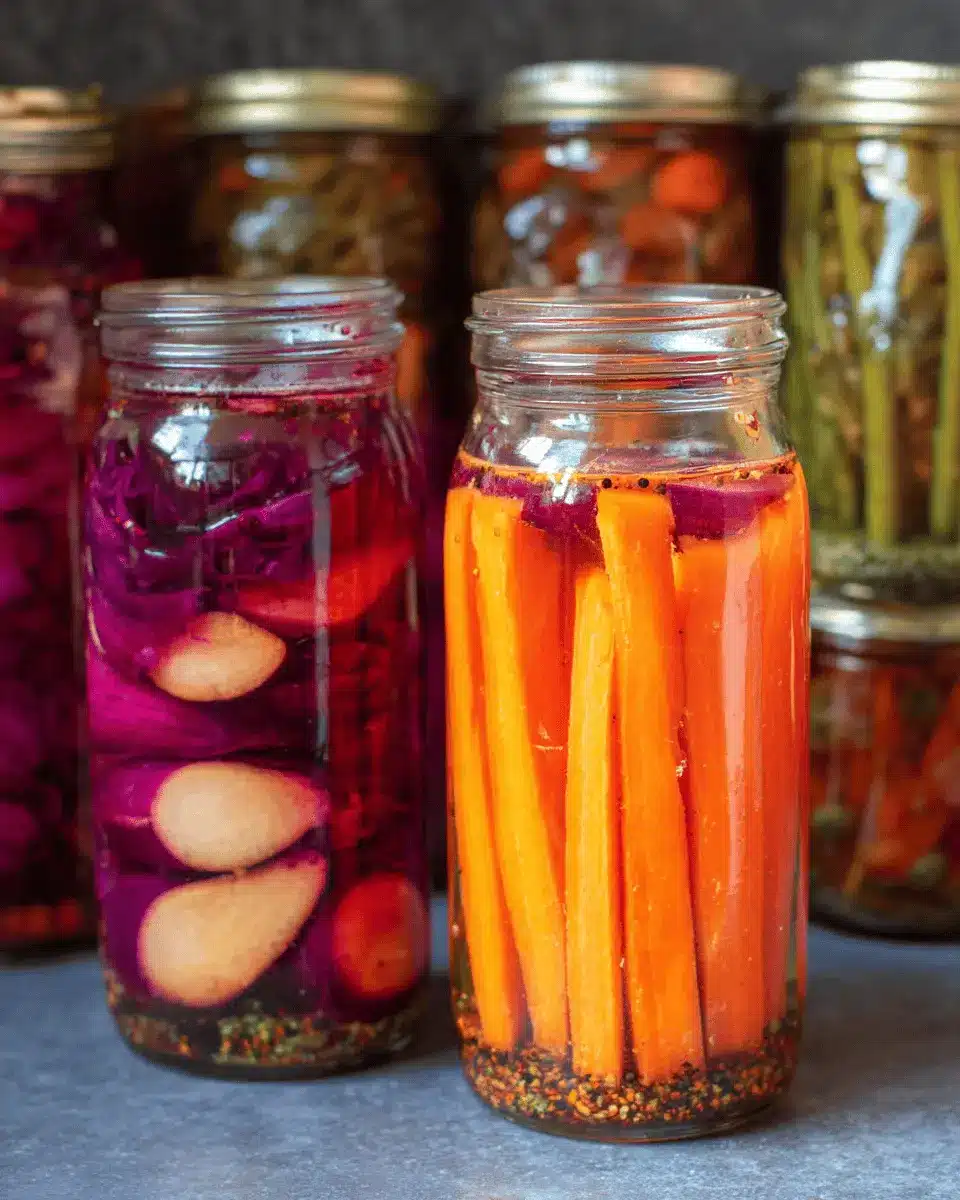
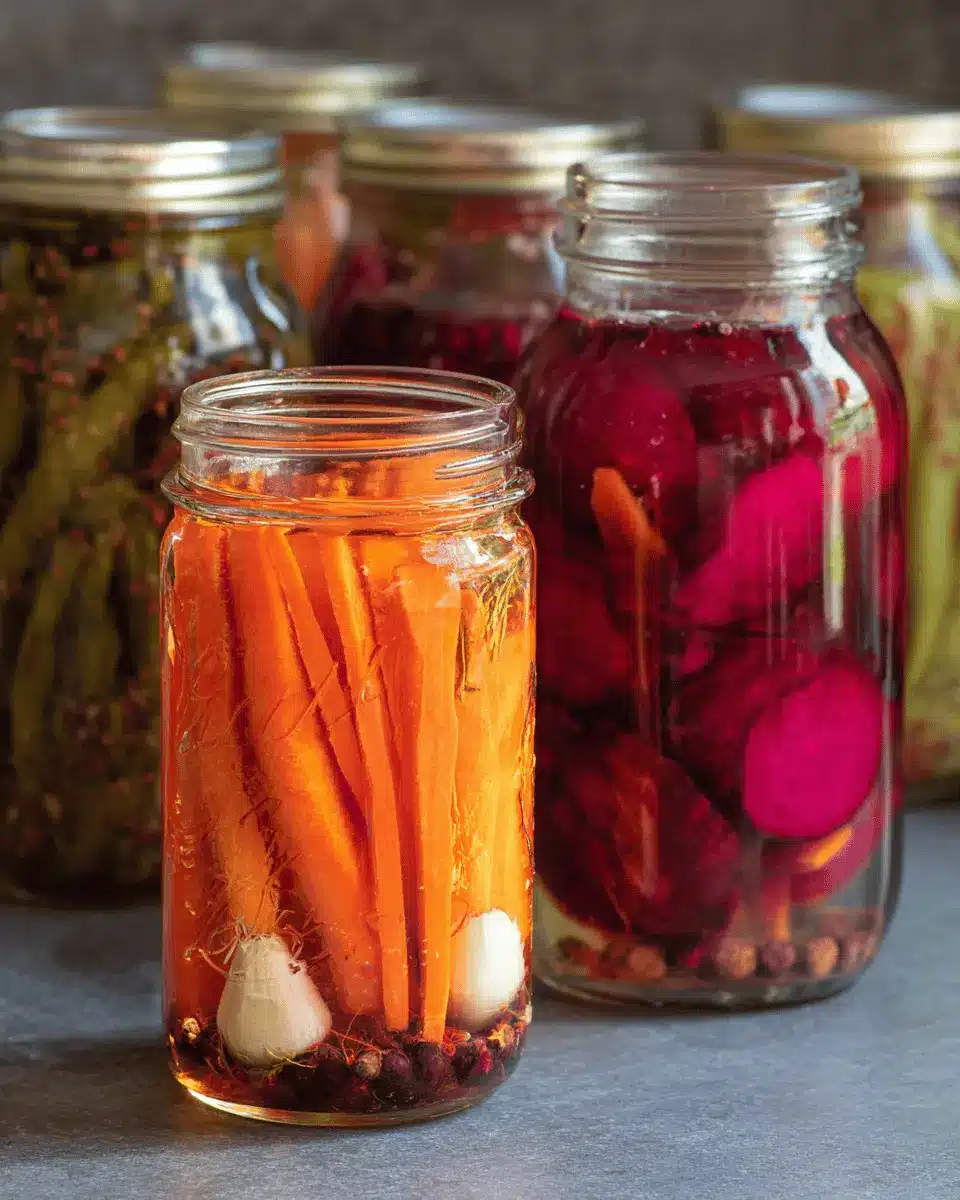
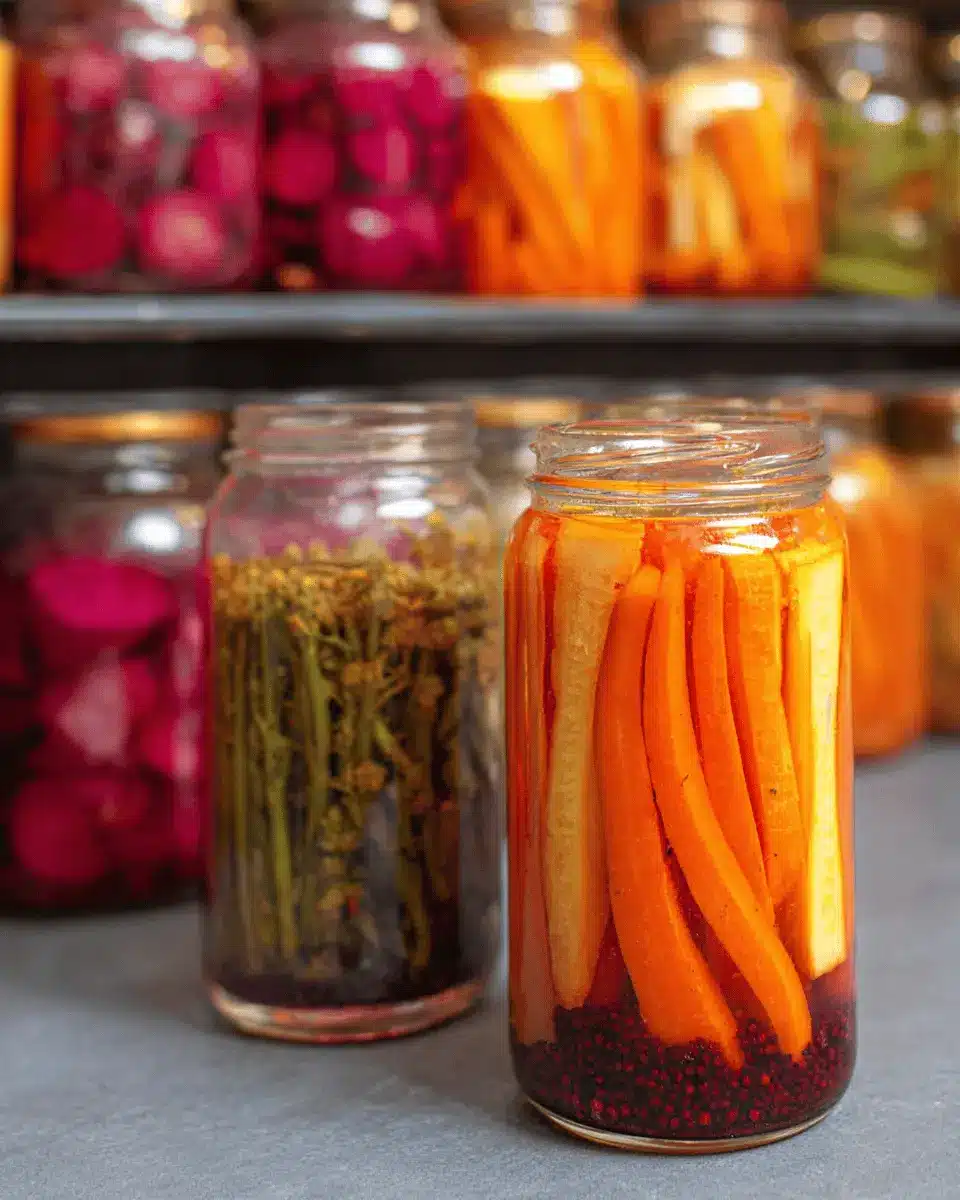
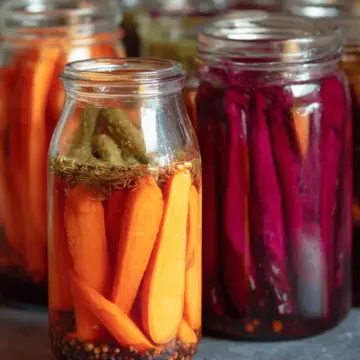
Step 3: Pack the vegetables in jars
Next, it’s time to deal with those mouthwatering veggies! Taking your prepared beets and carrots, pack them tightly into your clean jars. It’s okay if you have to smash them a bit—just ensure there’s about a ½ inch of space from the rim. The compression helps in ensuring they are fully submerged in the pickling liquid.
Step 4: Pour in the pickling liquid
Once your jars are filled with vegetables, it’s time to pour the cooled pickling liquid over them. Fill until just below the rim, again leaving some space for expansion. Don’t forget to gently tap the jars to release any air bubbles. If needed, add more liquid, then seal the jars tightly with lids.
Step 5: Refrigerate and wait for flavor to develop
Now comes the hardest part—waiting! Store your packed jars in the refrigerator and resist the urge to dig in. In about 1-2 days, you’ll be ready to experience the delightful taste of your refrigerator pickled vegetables. The longer they sit, the more pronounced the flavors become, and they’ll stay fresh for about 2-3 months.
So, gather your ingredients and get pickling! You’ll soon have a refreshing, tangy accompaniment for your meals that’ll impress your friends and elevate your culinary game.
Variations on Refrigerator Pickled Vegetables
Getting creative with your refrigerator pickled vegetables can elevate your meals and impress guests in a snap. Here are some exciting variations to try:
Spicy Pickled Vegetables for a Kick
If you love a little heat, add crushed red pepper flakes or sliced jalapeños to your brine. This spicy twist on refrigerator pickled vegetables can take your taste buds on an adventurous journey.
Sweet and Tangy Alternatives for a Unique Twist
For those who prefer a hint of sweetness, substitute a bit of honey or maple syrup for sugar. You can also toss in slices of sweet onion or bell peppers to balance the flavors and add a delightful complexity.
By exploring these variations, you can make your refrigerator pickled vegetables uniquely yours while still enjoying their crisp, refreshing taste. Check out this guide on pickling basics for more tips!
Cooking Tips and Notes for Refrigerator Pickled Vegetables
Storage Tips for Optimal Freshness
To keep your refrigerator pickled vegetables fresh and delicious, store them in the coldest part of your refrigerator. Using tightly sealed glass jars helps prevent any unwanted odors from the other foods in your fridge. Remember, these veggies taste even better as they marinate, so give them at least 1-2 days before digging in. They’ll stay good for about 2-3 months, but you bet they won’t last that long!
Substitutions for Seasonal Vegetables
Don’t have beets or carrots? No problem! This recipe is incredibly versatile. Try using seasonal vegetables like cucumbers, radishes, or even green beans. Each vegetable brings its unique crunch and flavor, so feel free to experiment. Always aim for a mix of colors to make your jars as vibrant as they are tasty—it's like a work of art in your fridge! Looking for more inspiration? Check out seasonal produce guides for fresh ideas.
Serving Suggestions for Refrigerator Pickled Vegetables
Ideal pairings for homemade meals
Refrigerator pickled vegetables are incredibly versatile and can elevate your meals in delightful ways. Pair them with sandwiches—like turkey bacon and a crunchy pickled carrot for a zingy contrast. They also shine alongside grilled chicken or beef for an unexpected burst of flavor. Want to spruce up your salads? Toss in some diced pickled beets or sliced cucumbers to brighten things up.
Creative ways to incorporate pickles in your dishes
Think outside the jar! Use your refrigerator pickled vegetables as a topping for tacos or as a tangy side for rice bowls. You can also chop them up and mix them into pasta salads for a zesty twist. Want a quick snack? Pair them with hummus or your favorite dip for a refreshing crunch. Explore even more ideas on incorporating pickled goods from Food Network. The possibilities are endless!
Time Breakdown for Refrigerator Pickled Vegetables
When it comes to making delicious refrigerator pickled vegetables, understanding the time commitment will help you plan accordingly.
Preparation time
The prep work is a breeze! You’ll need about 20 minutes to gather, chop, and pack your veggies into jars.
Pickling time
Once the jars are packed, let them sit in the fridge for a minimum of 1-2 days to allow those flavors to deepen and the veggies to absorb the brine.
Total time
In total, you’re looking at about 1-2 days from preparation to tasting, but don’t worry, the wait is totally worth it!
For more tips on vegetable preservation, you can check out this guide from the FDA. Happy pickling!
Nutritional Facts for Refrigerator Pickled Vegetables
Understanding the nutritional value of refrigerator pickled vegetables can enhance your meal planning and health decisions.
Calories
A typical serving of refrigerator pickled vegetables contains approximately 30-50 calories. This makes them a low-calorie addition to any meal, perfect for those watching their intake without sacrificing taste.
Vitamins and Minerals
These vibrant pickles are loaded with essential vitamins and minerals. For instance, beets are rich in folate, while carrots provide a boost of vitamin A. Together, they contribute fiber and antioxidants—great for supporting overall health. For a deeper dive into the benefits of these minerals, check out this article from Healthline.
Sodium Content
Keep in mind that refrigerator pickled vegetables do contain sodium due to the kosher salt used in the brine. A single serving may have around 300-400 mg of sodium, depending on how much salt is added. If you're watching your sodium intake, consider adjusting the salt to your taste or looking for low-sodium alternatives.
Incorporating refrigerator pickled vegetables into your diet not only adds flavor but also boosts your intake of various nutrients, making them a smart dietary choice.
FAQs about Refrigerator Pickled Vegetables
How long do refrigerator pickles last?
Refrigerator pickled vegetables can last from 2 to 3 months when stored properly in the fridge. It’s essential to keep them in airtight containers to maintain their crunchiness and flavor. After opening, be mindful of any changes in texture or smell, as these can indicate spoilage.
Can I use other types of vinegar?
Absolutely! While the recipe suggests using a combination of apple cider vinegar and white vinegar, feel free to experiment with other types. For instance, malt vinegar provides a unique flavor profile, while rice vinegar offers a milder taste. Just keep in mind that the acidity level should be at least 5% for safe preservation.
What vegetables are best for pickling?
When it comes to refrigerator pickled vegetables, options are endless! Cucumbers are traditional, but you can also pickle carrots, beets, onions, and even bell peppers. Choose vibrant and fresh vegetables for the best results, and remember that their texture and flavor can be enhanced with your chosen spices! If you’re searching for more ideas, check out this guide on pickling for inspiration.
Conclusion on Refrigerator Pickled Vegetables
Celebrate the delicious and vibrant world of refrigerator pickled vegetables at home. These easy-to-make pickles bring a burst of flavor to your meals while allowing you to preserve the freshness of seasonal veggies. Embrace your culinary creativity and enjoy this simple, yet rewarding, preservation method!
Celebrate Homemade Flavor and Preservation with Pickling
Creating refrigerator pickled vegetables is more than just a culinary project; it’s an expression of creativity and sustainability. Whenever you have extra veggies, pickling is a fantastic way to reduce waste and enhance your meals.
These quick pickles aren’t just a tasty side; they can add an exciting crunch to salads or sandwiches. Plus, they can be a thoughtful, homemade gift for friends and family.
Did you know that pickling is an ancient preservation method? According to the National Center for Home Food Preservation, it can also enhance the nutritional benefits of your produce, providing a probiotic boost if fermented.
Remember, the beauty of pickling lies in its versatility. Feel free to experiment with different vegetables and spices. What about adding radishes or green beans? The possibilities are endless! So roll up your sleeves, get your jars ready, and enjoy the satisfying process of making your own flavorful pickled vegetables. Happy pickling!
Refrigerator Pickled Vegetables
Equipment
- glass jars
- sauce pan
Ingredients
- 3 cups vinegar I used half apple cider vinegar & white vinegar
- 2 cup water
- 2 tablespoon kosher salt
- 1 tablespoon sugar Add another tablespoon if desired
- 6 cloves garlic
- 4 bay leaves
- 4 sprigs thyme
- 3 tablespoon coriander seeds
- 3 tablespoon black peppercorn
- 2 tablespoon dill
- 1 bunch beets 4 medium, ends trimmed, peeled and cubed
- 3 large carrots ends trimmed peeled and sliced into spears
Instructions
- In a large saucepan, simmer vinegar, water, salt, sugar, and other spices except vegetables (beets and carrots) until salt and sugar dissolved. Remove from heat and set aside.
- Pack prepared vegetables into clean canning jars without smashing them. Leave about ½ inch space from the rim.
- Pour pickling liquid into jars leaving ½ inch to the top. Tap jars to remove air bubbles and pour more only if necessary. Close the lid ajar and make sure the pickling liquid is at room temperature before closing the lid.
- Store them in the refrigerator and wait 1-2 days before cracking the lid open. Enjoy quick refrigerated pickles for 2-3 months.

Leave a Reply