
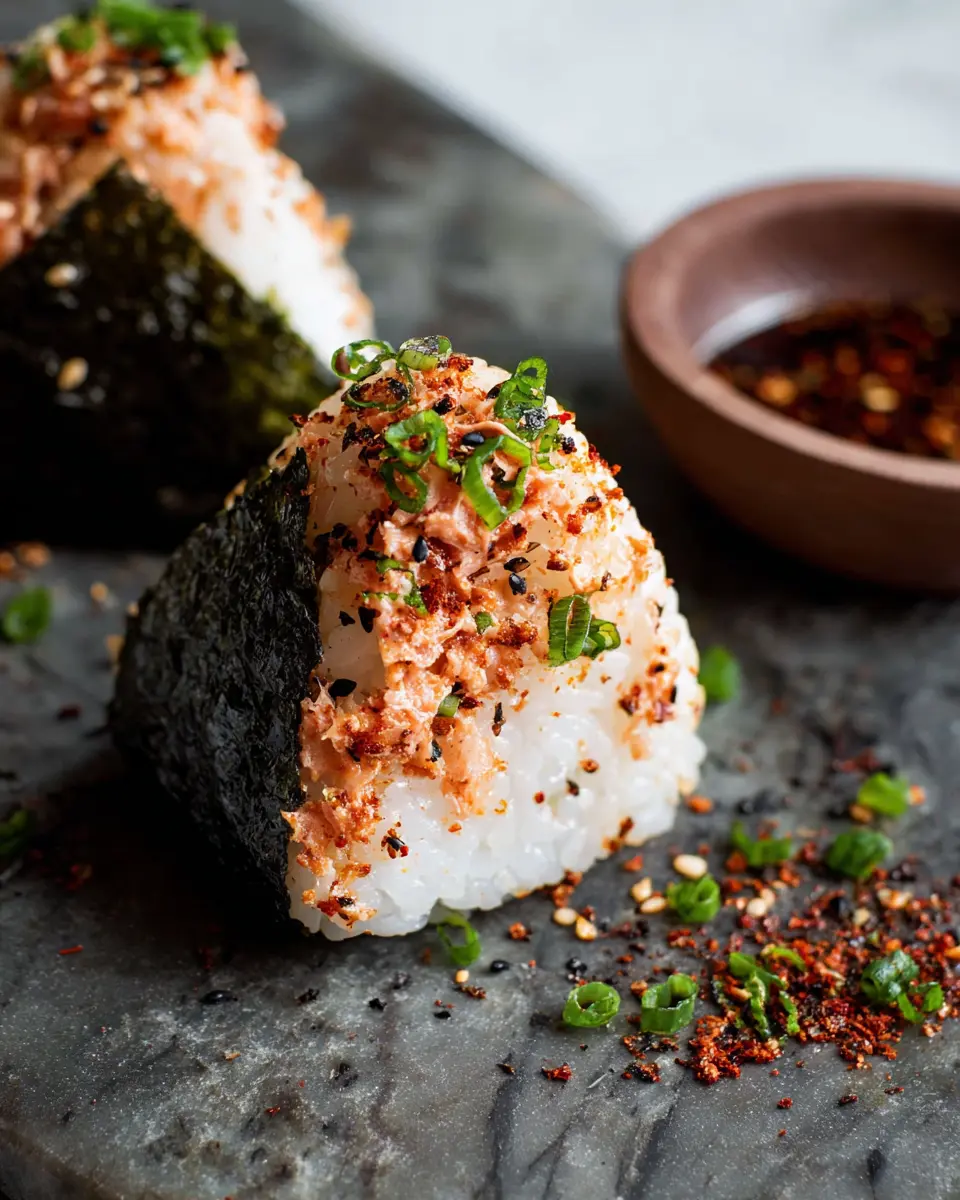
Introduction to Spicy Tuna Onigiri
Spicy tuna onigiri is not just a treat for sushi lovers; it’s also an exceptional choice for busy professionals who need a quick, nutritious meal. This delightful Japanese rice ball is versatile, portable, and can easily be made ahead of time. Imagine having a burst of flavor waiting for you in the fridge during your hectic workweek!
Why Homemade Onigiri is the Perfect Choice for Busy Professionals
Crafting your own onigiri can be a game-changer for your busy lifestyle. It’s a fantastic meal prep solution; you can whip up a batch over the weekend and grab one on your way out the door. Did you know that making your own onigiri can help you control portion sizes and nutrition? Store-bought options often lack quality ingredients, while homemade versions are packed with the flavors you love and tailored to meet your dietary needs.
Plus, onigiri is incredibly customizable! Want a hint of spice? Add extra sriracha to your spicy tuna onigiri. Prefer a milder flavor? Simply leave out the hot sauce and adjust the filling to your liking. With just a few pantry staples and some cooked rice, you can create a satisfying meal perfect for lunch breaks or snacking. Ready to dive into this delicious recipe? Let’s get started!
Ingredients for Spicy Tuna Onigiri
Essential ingredients for the perfect onigiri
To create mouthwatering spicy tuna onigiri, you'll need a few key ingredients that work together to pack maximum flavor. Start with 1½ cups of Japanese short-grain rice, which gives that delightful chewiness. Next, grab a 15-ounce can of Portofino Solid Albacore Tuna in olive oil—this adds depth and richness to your filling. You’ll also need 1½ tablespoons of mayonnaise and 1 teaspoon of sriracha for that creamy, spicy kick. A dash of ½ teaspoon rice vinegar brings a lovely acidity, while 1 sliced scallion adds a fresh crunch. Don’t forget kosher salt to season your rice perfectly!
Optional add-ins and toppings for personalization
Feel free to get creative with your spicy tuna onigiri! Consider adding avocado slices for creaminess, or throw in cucumber for a refreshing snap. Garnish with toasted black sesame seeds for an extra flair and texture. You could also experiment with different sauces like sweet chili sauce or even a drizzle of soy sauce on the side for dipping. The best part? Each onigiri can be customized to suit your taste buds, making it a delightful meal for everyone!
Preparing Spicy Tuna Onigiri
Making spicy tuna onigiri at home is not just an enjoyable way to spend your afternoon; it’s also a fantastic way to impress your friends at your next gathering. Let's walk through the steps together to ensure your onigiri turns out perfectly!
Rinse and Prepare the Sushi Rice
Begin by giving your sushi rice some much-needed TLC. Place the rice in a fine-meshed sieve and rinse it under cold water. As you rinse, gently rub the grains between your fingers until the water runs clear. This crucial step helps to remove excess starch, which can make the rice gummy. Rinse it thoroughly, then drain well before moving on to the next step.
Cook the Rice for the Perfect Texture
Cooking your rice to the right texture is vital for achieving that authentic onigiri experience. If you have a rice cooker, simply combine the rinsed rice with 15 fluid ounces of cold water and follow the manufacturer's instructions. If you're going old-school with a saucepan, bring the water to a gentle boil, then reduce the heat to low and cover. Cook for about 16 to 18 minutes until the water is absorbed. Once done, let it fluff up off the heat for another 10 minutes to achieve that ideal texture that clings together beautifully.
Whip Up the Spicy Tuna Filling
While the rice is cooling, let’s get the spicy tuna filling ready! In a medium bowl, combine one drained can of Portofino Solid Albacore Tuna in Extra Virgin Olive Oil with 1½ tablespoons of mayonnaise, 1 teaspoon of sriracha, and ½ teaspoon of rice vinegar. This combination creates a creamy, flavorful filling that elevates your onigiri. Don’t forget to stir in the finely sliced green parts of a scallion, which add a lovely freshness.
Assemble Your Onigiri with Precision
Now, it's time to put everything together into these delightful rice balls! Before you start shaping, prepare a bowl of room temperature water. Moisten your hands to prevent the rice from sticking, then sprinkle a pinch of kosher salt on your palms. Grab about ½ cup of sushi rice and gently mold it into a thick oblong shape in your hand. Add a tablespoon of your spicy tuna filling in the center, then close the rice around the filling, ensuring it’s well-enclosed.
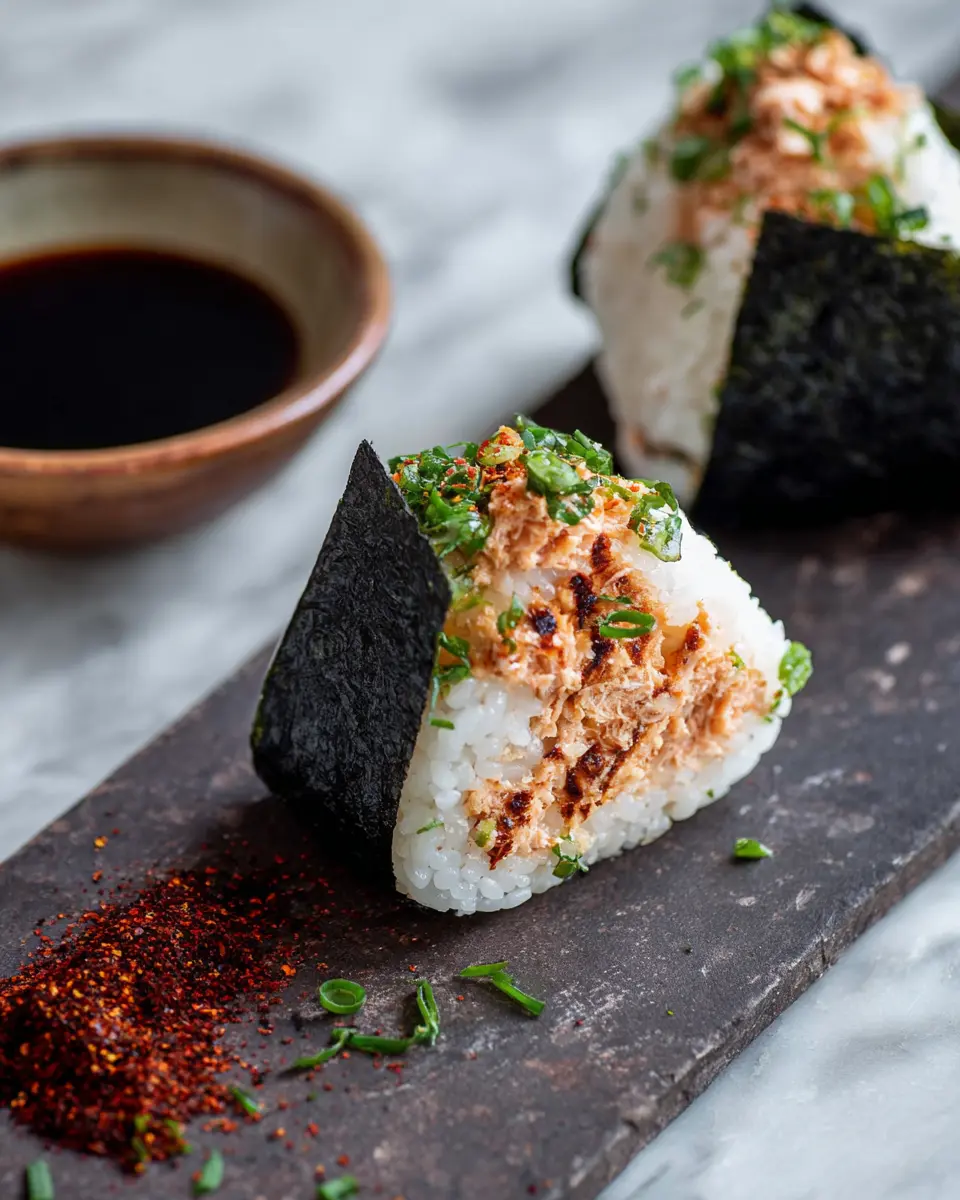
Wrap and Finish Your Delicious Onigiri
For that classic presentation, shape your onigiri into a triangle, using the palms of one hand and the fingers of the other for support. Lightly pressing while making sure not to compress too harshly will create an ideal bite. If you like, sprinkle some toasted black sesame seeds on top for added flavor and a touch of elegance. Finally, wrap your onigiri with a piece of toasted nori and top with a small spoonful of the tuna filling for that finishing touch!
Now you have homemade spicy tuna onigiri that not only looks fantastic but tastes incredible. Ready to dive in? Consider serving them with a side of pickled ginger or sliced cucumber for an extra zing! Happy cooking!
Variations on Spicy Tuna Onigiri
Spicy Salmon Onigiri for a Different Flavor Profile
If you're looking to switch things up, consider making spicy salmon onigiri. Simply replace the tuna with canned salmon, and keep the same delicious mix of mayonnaise, sriracha, and rice vinegar. This variation offers a unique flavor profile while maintaining the delightful texture of your onigiri. Salmon is rich in omega-3 fatty acids, making this option not only tasty but also nutritious.
Vegetarian Onigiri Options for Plant-Based Eaters
For those who prefer vegetarian choices, you can create a delightful veggie onigiri. Stuff your rice balls with ingredients like mashed avocado, cucumber, and pickled radish, or try a savory tofu filling mixed with soy sauce and sesame oil. These variations not only cater to plant-based eaters but also bring a refreshing twist to classic onigiri.
For more inspiration on plant-based recipes, check out Forks Over Knives, a fantastic resource for healthy vegetarian meals!
Cooking Tips and Notes for Spicy Tuna Onigiri
How to Avoid Mushy Rice
Achieving the perfect rice texture is crucial for delicious spicy tuna onigiri. To prevent mushiness, rinse the sushi rice thoroughly until the water runs clear, effectively removing excess starch. Once cooked, let it steam and rest with a kitchen towel over the pot, which allows moisture to redistribute. Going for a short-grain Japanese variety ensures that the rice clumps together beautifully while remaining fluffy.
Tips for Perfecting the Shape and Texture
Creating well-shaped onigiri is an art! Lightly wet your hands to stop the rice from sticking, and remember to sprinkle some kosher salt for seasoning as you mold. Grab a handful of rice—about ½ cup—and form it gently into an oblong shape. Don’t squish too hard; you want it compact but airy. As you shape the spicy tuna onigiri, rotating it like a sculptor will help maintain that inviting triangular look! For more expert rice tips, check out Serious Eats’ rice guide.
Serving suggestions for Spicy Tuna Onigiri
Pairing with sides for a complete meal
To create a well-rounded meal around your spicy tuna onigiri, consider adding sides that complement its bold flavors. A light miso soup is perfect for warming up the palate, while a crisp cucumber salad offers a refreshing contrast. You can also serve sliced pickled vegetables for a delightful crunch. For a heartier option, try pairing with some grilled chicken skewers or vegetable tempura. These colorful dishes not only enhance the dining experience but also provide various textures and tastes that elevate your meal.
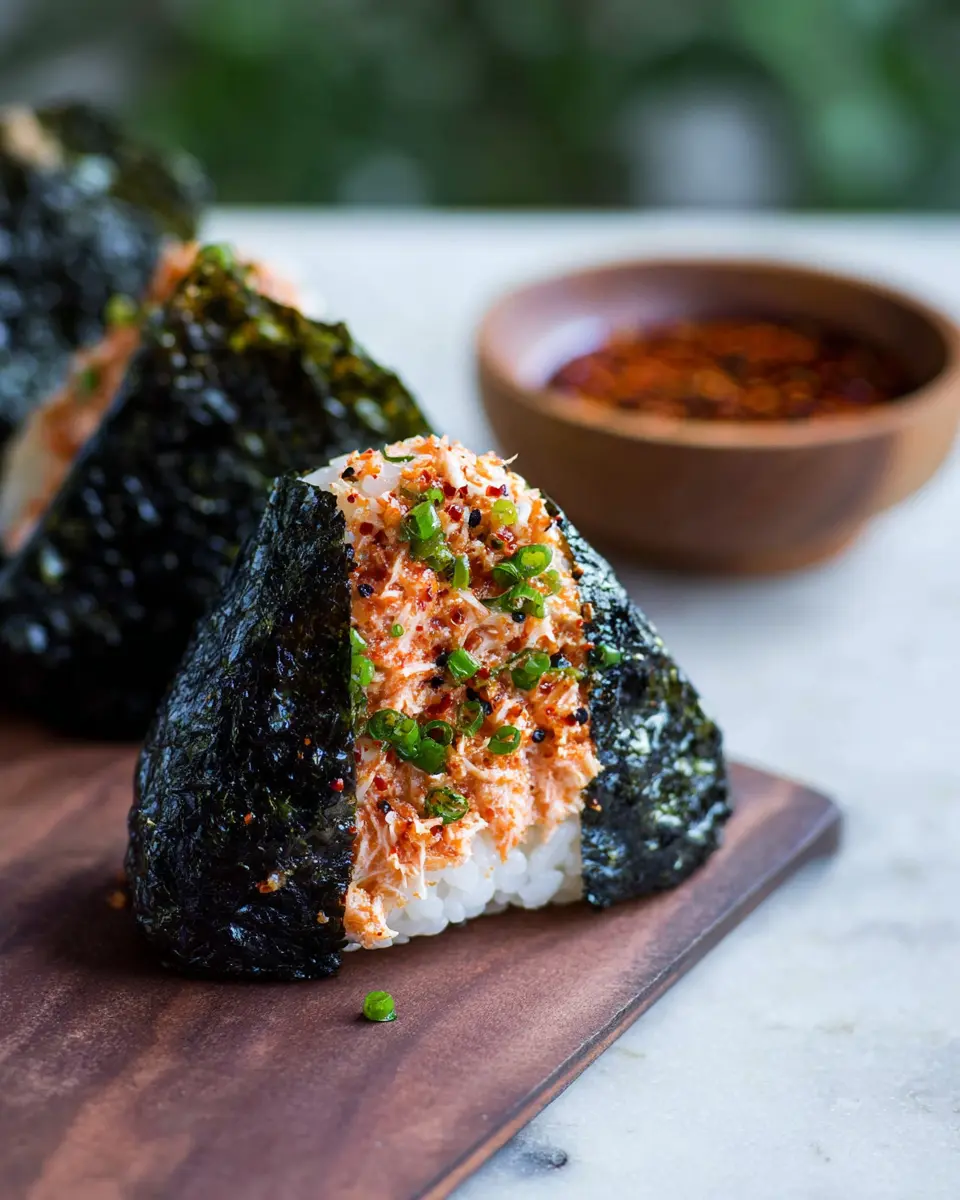
Creative plating ideas for gatherings
When serving spicy tuna onigiri at gatherings, presentation matters! Arrange the onigiri on a large, stylish platter and sprinkle with fresh herbs like cilantro or shiso leaves for a pop of color. Utilize small bowls for the sides, creating a vibrant display of flavors. You might also cluster them with decorative elements, such as edible flowers or sliced radishes, to make the dish visually enticing. Whether it's a casual picnic or an upscale dinner party, dazzling presentation can turn an ordinary meal into an extraordinary experience!
For further inspiration on plating, consider checking resources like Food52 for innovative ideas.
Time breakdown for Spicy Tuna Onigiri
Preparation time
Get your kitchen ready in just 20 minutes! This includes gathering your ingredients and prepping the rice and filling.
Cooking time
Let the rice work its magic for 30 minutes as it steams to perfection, creating that delicious base for your onigiri.
Total time
In just under an hour, specifically 50 minutes, you can enjoy homemade spicy tuna onigiri! It's an easy and satisfying way to bring a taste of Japan to your table.
For more tips on perfecting your onigiri-making skills, check out this Japanese rice guide!
Nutritional Facts for Spicy Tuna Onigiri
Calories
Each serving of spicy tuna onigiri contains approximately 250 calories. This makes it a satisfying yet light option for a meal or snack.
Protein
Packed with flavor, this dish also delivers a notable 10 grams of protein per serving thanks to the tuna filling. It’s a great way to fuel your body, especially if you’re on the go.
Sodium
Be mindful of your sodium intake! Each spicy tuna onigiri contains around 150 milligrams of sodium. If you're watching your salt consumption, consider adjusting the amount of added salt or sauce in the recipe.
For a deeper dive into nutritional values or to find alternatives, check out resources from Healthline or the USDA Food Composition Database.
FAQs about Spicy Tuna Onigiri
Can I use other types of fish for the filling?
Absolutely! While this recipe features spicy tuna onigiri, you can get creative with your fillings. Try using salmon, crab, or even a plant-based option for a vegetarian twist. Each type of fish brings its unique flavor, making your onigiri fun and varied. If you're looking for something different, consider incorporating beef or chicken ham for a fusion twist!
How long can I store leftover onigiri?
Leftover spicy tuna onigiri can be stored in an airtight container in the fridge for up to 3 days. However, they are best enjoyed fresh. If you want to store them for a longer period, consider freezing them—just make sure to wrap each piece tightly. When ready to eat, simply thaw and enjoy!
Is onigiri a good meal prep option?
Absolutely! Onigiri is a fantastic meal prep option for busy individuals. This portable snack can be made in advance, offering a great on-the-go lunch. You can switch up your fillings throughout the week to keep things interesting. For more ideas on meal prepping, check out this article.
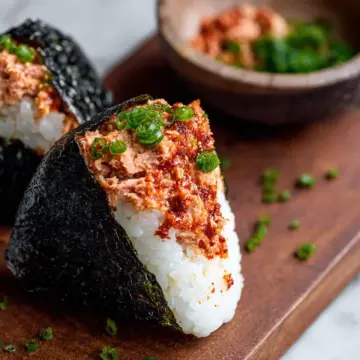
Conclusion on Spicy Tuna Onigiri
In summary, creating spicy tuna onigiri at home is straightforward and rewarding. The blend of flavors from the tuna, sriracha, and scallions wrapped in perfectly cooked rice offers a delightful bite. Perfect as a snack or light meal, these onigiri will surely impress your friends and family. Happy cooking!
Spicy Tuna Onigiri
Equipment
- Rice Cooker
- Fine-Meshed Sieve
- medium bowl
- Non-Stick Saucepan
- Rice Paddle
Ingredients
Rice
- 1.5 cups Japanese short-grain rice (sushi rice) about 2 rice cooker cups
- 15 fluid ounces cold water 440 mL
- to taste kosher salt
Filling
- 1 (4.5-ounce) can Portofino Solid Albacore Tuna in Extra Virgin Olive Oil drained
- 1.5 tablespoons mayonnaise
- 1 teaspoon sriracha hot sauce
- 0.5 teaspoon rice vinegar
- 1 scallion (green parts only) finely sliced
- toasted black sesame seeds for sprinkling (optional)
- 3 sheets toasted nori cut crosswise in half
Instructions
Preparation
- Prepare the rice: Place the rice in a fine-meshed sieve and rinse well under cold water, rubbing the grains of rice between your fingers, until the water runs clear. Drain well.
- Combine the rice and water, and cook in a rice cooker according to the manufacturer’s directions.
- If you do not own a rice cooker: Combine the rice and water in a medium saucepan. Bring to a boil, reduce heat to low, and cook covered for 16 to 18 minutes or until the water has been completely absorbed. Remove from heat, fluff the rice, cover with a clean towel and let stand covered for 10 minutes.
- While the rice cools slightly, prepare the onigiri filling.
Filling
- In a medium bowl, combine the albacore tuna, mayonnaise, hot sauce, and rice vinegar until evenly combined. Stir in the scallions.
Assembly
- Set aside a bowl of room temperature water and a small bowl of kosher salt. Once the sushi rice is cool enough to handle, start assembling the onigiri.
- Lightly moisten your hands by dipping them in the water bowl. Sprinkle your palms with kosher salt. Grab roughly ½ cup of sushi rice and gently press into an oblong shape.
- Add a tablespoon of the tuna filling to the center of the rice and close the rice over the filling.
- Gently shape the rice ball into a wide triangular shape. Avoid compressing the rice too hard. Sprinkle the outside with black sesame seeds.
- Wrap each onigiri in a nori sheet and place an additional small spoonful of tuna filling on top. Serve immediately.


Leave a Reply