
Introduction to Tuna Melt
Why the Tuna Melt is a Comfort Classic
Ah, the tuna melt: a beloved dish that’s both nostalgic and incredibly delicious. This sandwich has secured its place as a comfort food staple for good reason. It combines flaky, flavorful tuna salad with creamy, melted cheese, all nestled between two perfectly toasted slices of bread. When you take that first bite, you get a warm, savory hug that simply melts your worries away.
What makes the tuna melt so special? For many, it brings back memories of cozy family lunches or late-night snacks during those study marathons in college. It’s fast and effortlessly satisfying — the perfect meal for a busy weekday when time is tight but the craving for comfort food is high. Plus, with simple ingredients like canned tuna, mayonnaise, and cheese, it’s budget-friendly and easy to whip up at home.
If you're curious about the history of this classic, you'll find diverse versions (check out this great resource on food history) across different cuisines. Whether you prefer it with a spicy twist or a more traditional flair, the tuna melt remains an enduring favorite that invites personalization and creativity. Let’s dive into crafting your very own tuna melt masterpiece!
Essential Ingredients for the Perfect Tuna Melt
Creating a delicious tuna melt is all about having the right ingredients on hand. This classic comfort food combines simple components that pack a punch of flavor and satisfaction. Here’s what you’ll need:
- Mayonnaise: This creamy base adds richness and binds the tuna and veggies together. Aim for a good-quality mayo for the best taste.
- Tuna: Opt for two 6-ounce cans of your favorite tuna. Light or chunk white tuna works wonderfully here.
- Veggies: Freshness is key. You’ll need finely chopped celery, dill pickles, red onion, and parsley for added crunch and flavor.
- Bread: Choose a sturdy loaf like sourdough—its chewy texture holds up well to the filling.
- Cheese: Go for sharp cheddar or American—but don’t skimp! Melty gooeyness is what we're after.
- Butter: Softened butter, used for greasing your bread, creates a delightful golden crust.
For more inspiration, check out this guide on making the best tuna salad to elevate your tuna melt!
Preparing the Tuna Melt
Creating the perfect tuna melt is a straightforward yet delightful process. The result is a warm and cheesy sandwich packed with flavor that will satisfy any lunch craving. Let’s dive into the step-by-step guide!
Mix the Tuna Salad
The foundation of any good tuna melt lies in the tuna salad. Start by gathering your ingredients in a large mixing bowl. Combine ⅓ cup of mayonnaise, the juice of ½ a lemon, and if you like a bit of heat, ½ teaspoon of crushed red pepper flakes. Whisk these together until smooth.
Next, it's time to introduce the stars: two 6-ounce cans of drained tuna. Using a fork, gently break up the tuna into flakes, allowing it to mix well with your creamy base. Add in 1 finely chopped celery rib, 2 finely chopped dill pickles, ¼ cup of finely chopped red onion, and 2 tablespoons of fresh parsley for that refreshing, herby touch. Don't forget to season with kosher salt and freshly ground black pepper – a pinch of both will elevate the flavors. Give it all a good toss to ensure everything is combined nicely.
Assemble the Tuna Melt Sandwich
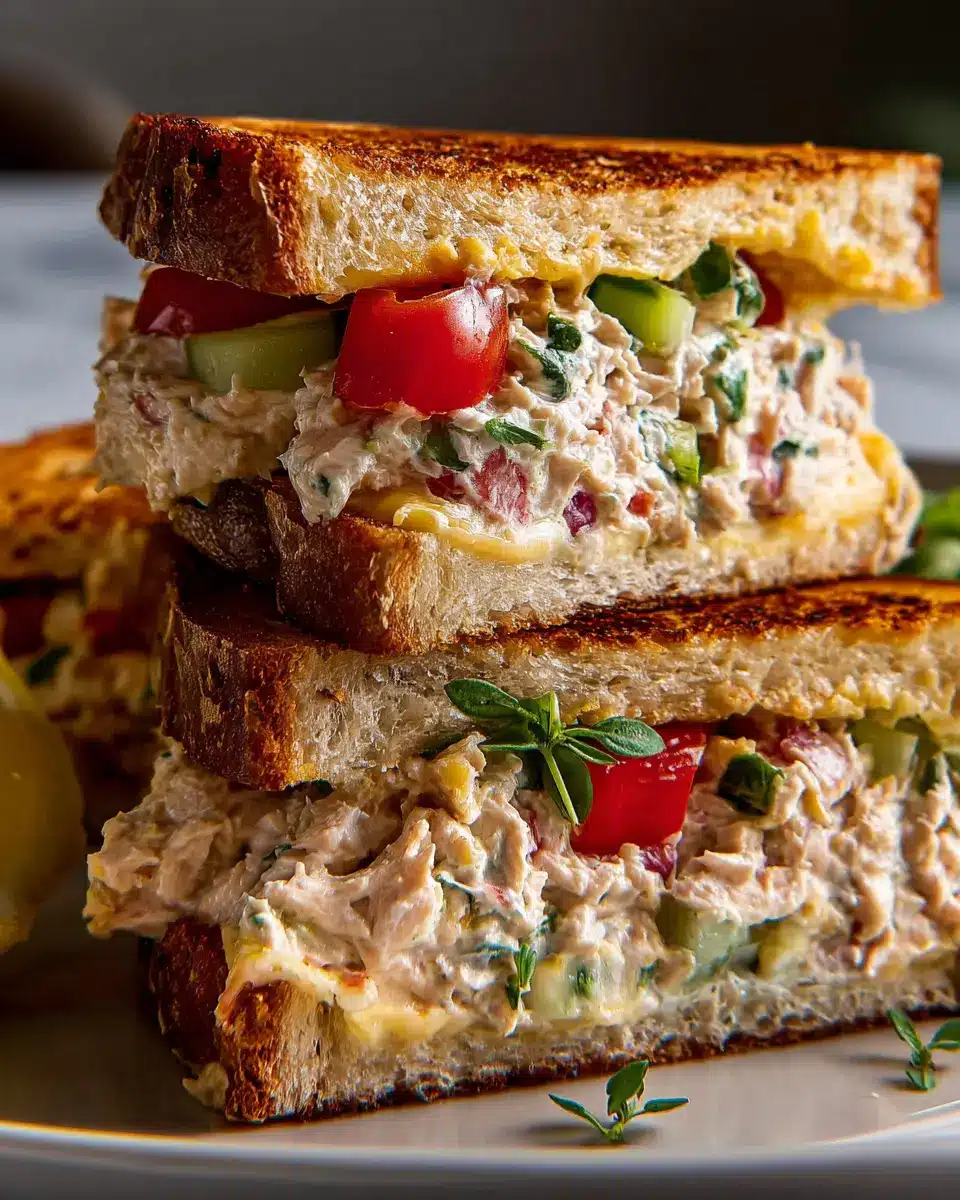
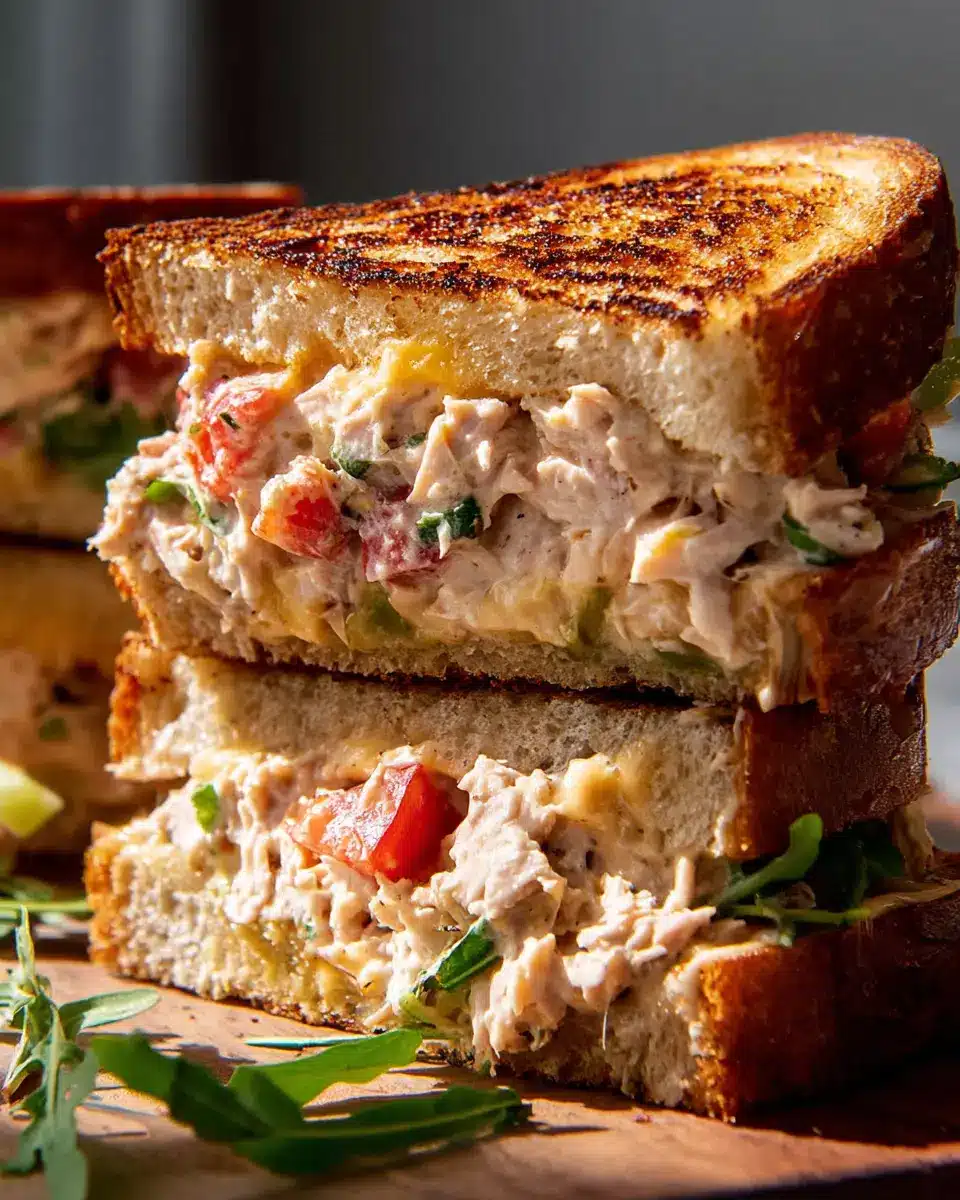
Once your tuna salad is ready, it’s time for assembly. Spread 4 tablespoons of softened unsalted butter on one side of each slice of bread (think sourdough for an extra flavor kick). On the unbuttered side of half the slices, load about ½ cup of tuna salad, followed by 1-2 slices of tomato, and 2 slices of cheddar or American cheese. Top it off with another slice of bread, butter side up. Repeat this for the remaining sandwiches. If you're curious what perfectly assembled looks like, take a peek at this how-to guide on sandwich assembly.
Cook the Tuna Melt on the Stovetop
Cooking the tuna melt is where the magic happens. Preheat a large nonstick skillet over medium heat. Once hot, carefully place two sandwiches in the skillet, making sure the cheese is facing down. Cook them for about 2-3 minutes until they're golden brown and ooze deliciousness. Flip the sandwiches with care, and allow the second side to brown for another 2-3 minutes, ensuring the cheese melts beautifully inside.
Achieve the Golden Brown Finish
The golden brown finish is crucial for the perfect tuna melt. You want that crispy outer layer to contrast the soft, cheesy goodness within. If you’re feeling adventurous, you can add a little extra butter in the pan before flipping for that next level of richness. Once cooked, transfer your tuna melts to a plate, and don’t forget to repeat the process with the remaining sandwiches. Serve them warm and enjoy!
Now that you’ve mastered your tuna melt, consider pairing it with a refreshing side salad or some crispy chips for a complete meal. Happy cooking!
Variations on Tuna Melt
Tuna melts can be a delightful canvas for creativity in the kitchen. Here are two exciting variations that elevate the classic recipe.
Spicy Tuna Melt with Jalapeños
Kick up the heat with a spicy tuna melt! Simply add sliced jalapeños to your tuna mixture for an extra punch. You can also mix in some sriracha or your favorite hot sauce to transform your melt into a fiery sensation. Top it off with pepper jack cheese for a succulent spiciness that pairs perfectly with the creamy tuna filling.
Mediterranean Tuna Melt with Feta and Olives
Transport your taste buds with a Mediterranean twist! Incorporate crumbled feta cheese and chopped Kalamata olives into your tuna mix. This variation not only adds a tangy flavor but also infuses the dish with vibrant Mediterranean vibes. Use oregano or a drizzle of olive oil for that extra touch, and opt for a crusty artisan bread that beautifully complements these bold flavors.
Feel free to explore these variations, and make your next tuna melt a standout dish! Looking for more inspiration? Check out this guide on creative sandwich ideas for even more culinary adventures.
Cooking Tips for Tuna Melt
Choosing the Right Bread
The foundation of a great tuna melt begins with the right bread. Opt for a sturdy option like sourdough or whole grain, which can hold up against the moist tuna salad without becoming soggy. A thicker slice not only adds texture but also enhances the overall flavor. If you’re feeling adventurous, try a flavored bread like jalapeño cheddar for an extra kick!
Tips for Melting Cheese Perfectly
To achieve that ooey-gooey cheese goodness, consider using medium heat on your skillet. This allows the cheese to melt evenly without burning the bread. You can also cover the skillet with a lid for a minute or two while cooking; this traps heat and helps the cheese melt faster. For an added twist, mix cheeses—compliment sharp cheddar with creamy American for a delicious combo.
For more insights on creating the perfect cheese melt, check out Cheese Science Toolkit for in-depth methods and tips!

Serving Suggestions for Tuna Melt
Pairing Sides for a Balanced Meal
To elevate your tuna melt experience, consider pairing it with fresh, vibrant sides. A simple green salad with cherry tomatoes, cucumber, and a zesty vinaigrette can add a refreshing contrast. Alternatively, crispy sweet potato fries or a side of crunchy coleslaw will complement the richness of the melt beautifully. For a cozy touch, serve alongside a warm cup of tomato soup — the perfect dipping companion!
Creative Serving Ideas
Why not get a little fancy? Slice your tuna melt into dippers for a fun twist at gatherings. You could also place mini versions on a platter for an easy appetizer. Experiment with adding toppings like sliced avocado or a dash of buffalo sauce for an exciting flavor kick! To keep it light, try wrapping the tuna filling in lettuce leaves rather than bread. Check out more creative options for serving sandwiches on Food Network for inspiration!
Time Breakdown for Tuna Melt
Preparation Time
Get ready to whip up this scrumptious tuna melt in just 15 minutes! That’s all the time you need to gather your ingredients and mix up that flavorful tuna salad.
Cooking Time
Once your sandwiches are assembled, the cooking process will take about 15 minutes. You’ll be flipping and browning those tasty creations to melty perfection!
Total Time
In just 30 minutes, you can enjoy a delicious homemade tuna melt that’s sure to impress. Perfect for a quick lunch or a cozy dinner! Want more tips on efficient cooking? Check out Serious Eats for excellent kitchen hacks and tricks!
Nutritional Facts for Tuna Melt
When you're grabbing a tuna melt for lunch or dinner, it's good to know what you're indulging in. Here's a quick breakdown of the nutritional facts that can help you keep track of your intake:
Calories
One serving of this delightful tuna melt contains approximately 1226 calories, making it quite hearty.
Protein
Packed with protein, each serving offers around 62 grams. This makes it a solid option for those looking to fuel a busy day.
Sodium
However, be mindful of the sodium content—each serving has roughly 1620 mg. If you're watching your salt intake, consider using low-sodium tuna or adjusting your ingredients.
For more insights on maintaining a balanced diet, check out this guide from the USDA. Staying informed can help you enjoy your favorite dishes while keeping your nutrition in check!
FAQs about Tuna Melt
Can I use fresh tuna instead of canned?
Absolutely! Using fresh tuna can elevate your tuna melt to a whole new level. Simply sear the fresh tuna steak until it's cooked to your liking, then flake it into your mayo mixture as you would with canned tuna. Just remember, fresh tuna has a more delicate flavor, so consider seasoning lightly to let its natural taste shine.
What’s the best type of cheese for Tuna Melt?
When it comes to tuna melts, the classic choice is cheddar or American cheese. These options melt beautifully and give that comforting, gooey texture we all love. However, feel free to get creative! Swiss or pepper jack can also add a unique twist and a bit of extra flavor.
How can I make a healthier version of Tuna Melt?
Want a healthier twist on the classic tuna melt? Here are a few tips:
- Use Greek yogurt instead of mayonnaise for added protein.
- Opt for whole-grain bread to boost fiber and nutrients.
- Add veggies like spinach or bell peppers to increase the nutritional value without sacrificing flavor.
- Consider reducing the cheese or using low-fat options if you're watching your calories.
For more variations and ideas, check out Healthline's guide on healthy substitutions!
Conclusion on Tuna Melt
Final Thoughts on Enjoying Homemade Tuna Melts
Creating the perfect tuna melt at home not only satisfies your taste buds but also provides an opportunity to customize ingredients to your liking. Whether you prefer it classic or with a twist, this comforting sandwich is a delightful choice for lunch or dinner. Get creative, enjoy each bite, and share this delicious experience with friends!
Tuna Melt
Equipment
- large bowl
- Nonstick Skillet
Ingredients
Tuna Salad
- ⅓ cup mayonnaise
- ½ none lemon juice Juice of ½ lemon
- ½ teaspoon crushed red pepper flakes optional
- 2 cans tuna 6-oz. cans
- 1 none celery rib finely chopped
- 2 none dill pickles finely chopped
- ¼ cup red onion finely chopped
- 2 tablespoon fresh parsley finely chopped
- to taste none Kosher salt
- to taste none freshly ground black pepper
Sandwich Assembly
- 4 tablespoon unsalted butter softened
- 8 slices bread such as sourdough
- 1 none tomato sliced
- 8 slices cheddar or American cheese
Instructions
Preparation
- In a large bowl, whisk mayonnaise, lemon juice, and red pepper flakes (if using).
- Drain tuna, then add to mayonnaise mixture. Using a fork, break up tuna into flakes. Add celery, pickles, onion, and parsley and toss to combine; season with salt and pepper.
- Spread butter on one side of each bread slice. Top an unbuttered side with about ½ cup tuna salad, 1 to 2 slices tomato, and 2 slices of cheese. Top with another slice of bread buttered side up. Repeat with remaining sandwiches.
- Preheat a large nonstick skillet over medium heat. Add 2 sandwiches, arranging cheese side closest to pan, and cook until golden brown, 2 to 3 minutes. Flip and continue to cook until golden brown on the other side and cheese is melty, 2 to 3 minutes more. Transfer sandwiches to a plate.
- Repeat with remaining sandwiches. Serve warm.

Leave a Reply