
Introduction to Watermelon Mochi
Watermelon mochi is a delightful twist on traditional Japanese mochi, perfectly suited for warm days and festive gatherings. Imagine sinking your teeth into a soft, chewy exterior that gives way to the sweet, refreshing flavor of fresh watermelon. This unique dessert not only satisfies your sweet tooth but also brings a burst of summer nostalgia, making it a favorite among friends and family.
Why you’ll love watermelon mochi
One of the best things about watermelon mochi is how easy it is to make. With just a few simple ingredients and minimal prep time, you can whip up a delicious treat that will impress your guests and leave them craving more. Not to mention, it's gluten-free—making it a great option for those with dietary restrictions.
Want to elevate your mochi experience? Pair it with a scoop of your favorite ice cream or serve it alongside some fresh fruits for a gorgeous dessert platter. This summer, make watermelon mochi the star of your picnics and BBQs. Research indicates that refreshing desserts like these can improve mood and overall satisfaction during warm months.
So why not bring a slice of summer into your kitchen today? Dive into this easy recipe and discover just how sweet and chewy happiness can be! For more insights on mochi, check out Just One Cookbook for an array of delicious Japanese recipes.
Ingredients for Watermelon Mochi
Creating your delightful watermelon mochi starts with a few simple, yet essential ingredients. Let’s gather everything you need to ensure a sweet and chewy treat!
- Glutinous Rice Flour (200g / 1 ½ cups): This is the star ingredient, giving mochi its characteristic chewiness.
- Granulated Sugar (65g / ⅓ cup): A little sweetness goes a long way, balancing the flavors beautifully.
- Corn Starch (40g / ⅓ cup): This helps to create a smoother texture and prevents the mochi from being too sticky.
- Watermelon Juice (240ml / 1 cup): Freshly strained juice adds vibrant flavor; feel free to blend your watermelon at home for maximum freshness!
- Vegetable Oil (1 ½ tbsp): This will keep your mochi from sticking during the cooking process.
As you gather these ingredients, remember: the quality of your watermelon juice plays a significant role in flavor. Choose ripe, sweet watermelons for the best results! If you're curious about the health benefits of watermelon, check out Healthline's insights for a deeper dive.
Step-by-Step Preparation of Watermelon Mochi
If you’re ready to embark on a delicious adventure with watermelon mochi, you’re in for a treat. This Japanese treat is not just a feast for your taste buds but also a fun project to bring to life in your kitchen. Let’s dive into the steps!
Prepare the Watermelon Juice
First things first, you need to capture the essence of summer — the juicy watermelon! Start by cutting the watermelon into chunks and tossing them into a blender. Blitz until smooth to get the maximum flavor. To ensure your mochi has a delightful texture, strain the blended mixture through a fine mesh sieve. This removes any pulp, giving you a beautiful, pure juice. You want about a cup, so make sure to adjust your watermelon quantity accordingly.
Mix the Dry Ingredients
In a separate bowl, combine your dry ingredients: glutinous rice flour, granulated sugar, and cornstarch. It’s crucial to whisk these together thoroughly to ensure that there are no clumps. This mixture is the foundation of your mochi and will help it achieve that iconic chewy texture. If you’re looking for more tips on working with glutinous rice flour, consider checking out this guide on making mochi.
Combine Wet and Dry Ingredients
Now it’s time for some magic! Pour the freshly strained watermelon juice and vegetable oil into your bowl of dry ingredients. Whisk the mixture until it’s completely smooth and all the elements are well combined. You should see those lovely pink hues coming through — it's as refreshing as it sounds!
Cook the Mochi Mixture
Heat a deep frypan or saucepan over medium heat. Add your mochi mixture to the pan. This step is the heart of the process—keep stirring consistently for about 5-8 minutes. You’ll notice the mixture getting thicker and transitioning to a glossy, dark pink color. The texture should be exceptionally sticky, which means you’re doing it right!
Set the Mochi
Remove your pan from the heat and prepare a 12cm x 12cm square mold, lined with parchment paper to prevent sticking. Pour the warm mochi into the mold and use a spatula to flatten it evenly. Once done, place your creation in the fridge for about 1-2 hours. This chilling time is essential for helping it firm up.
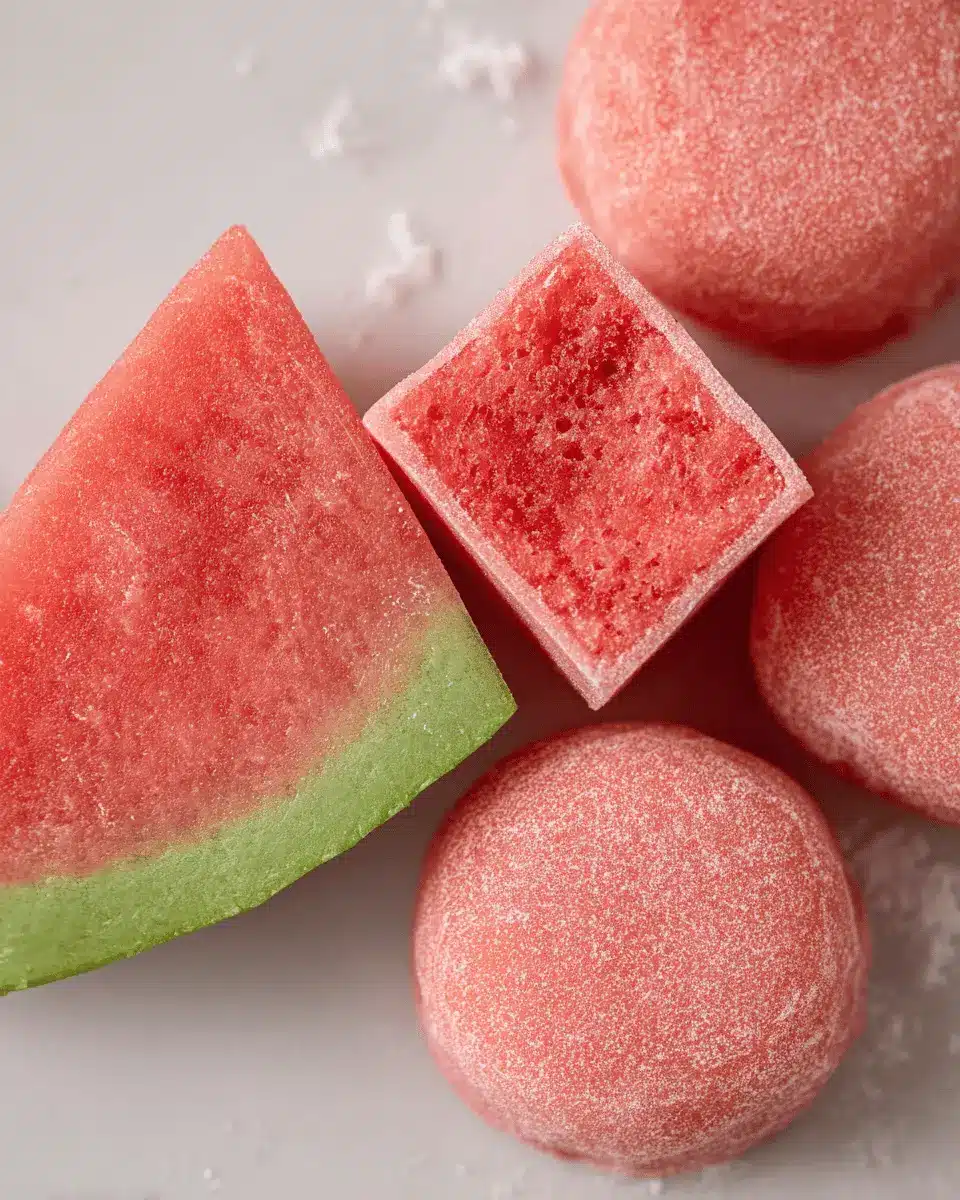
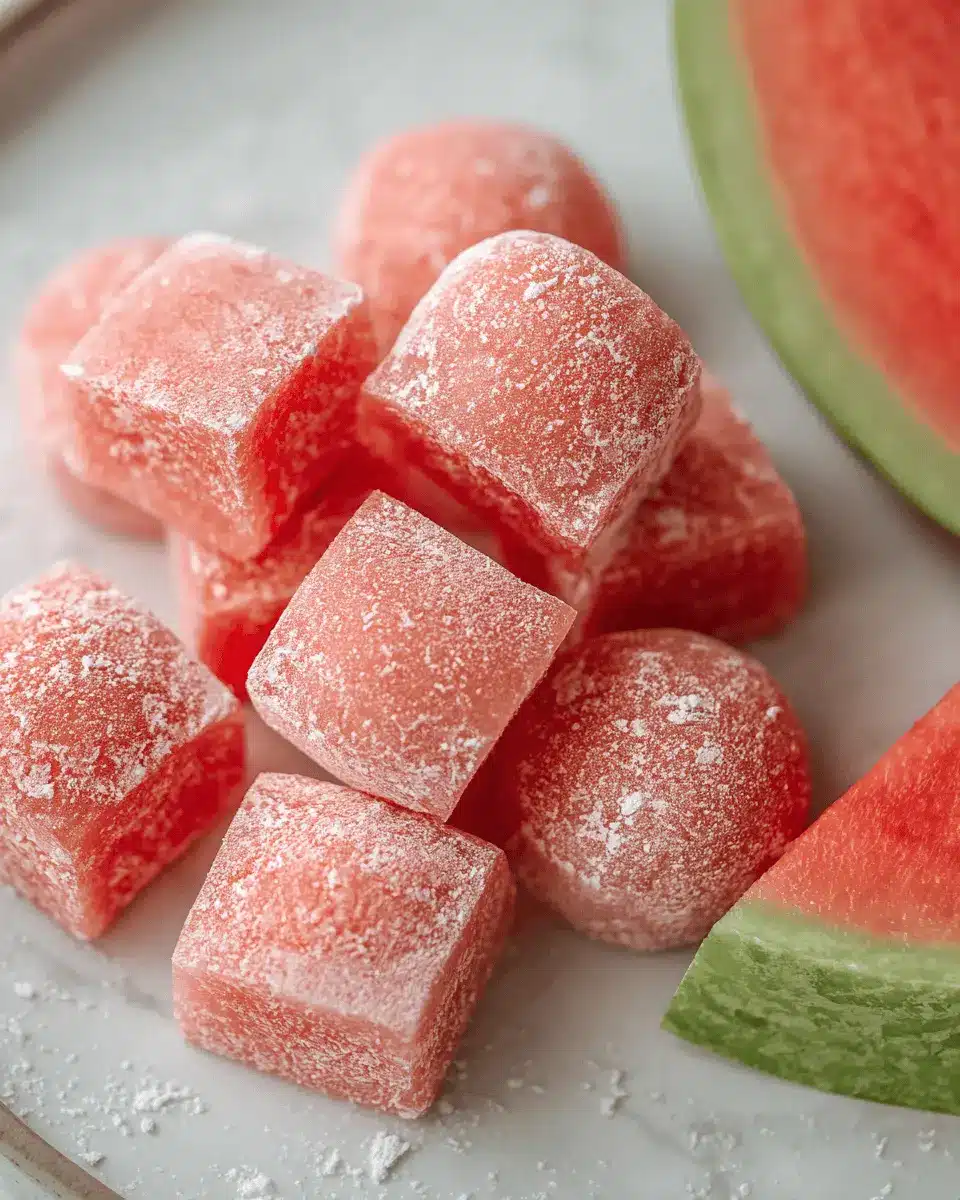
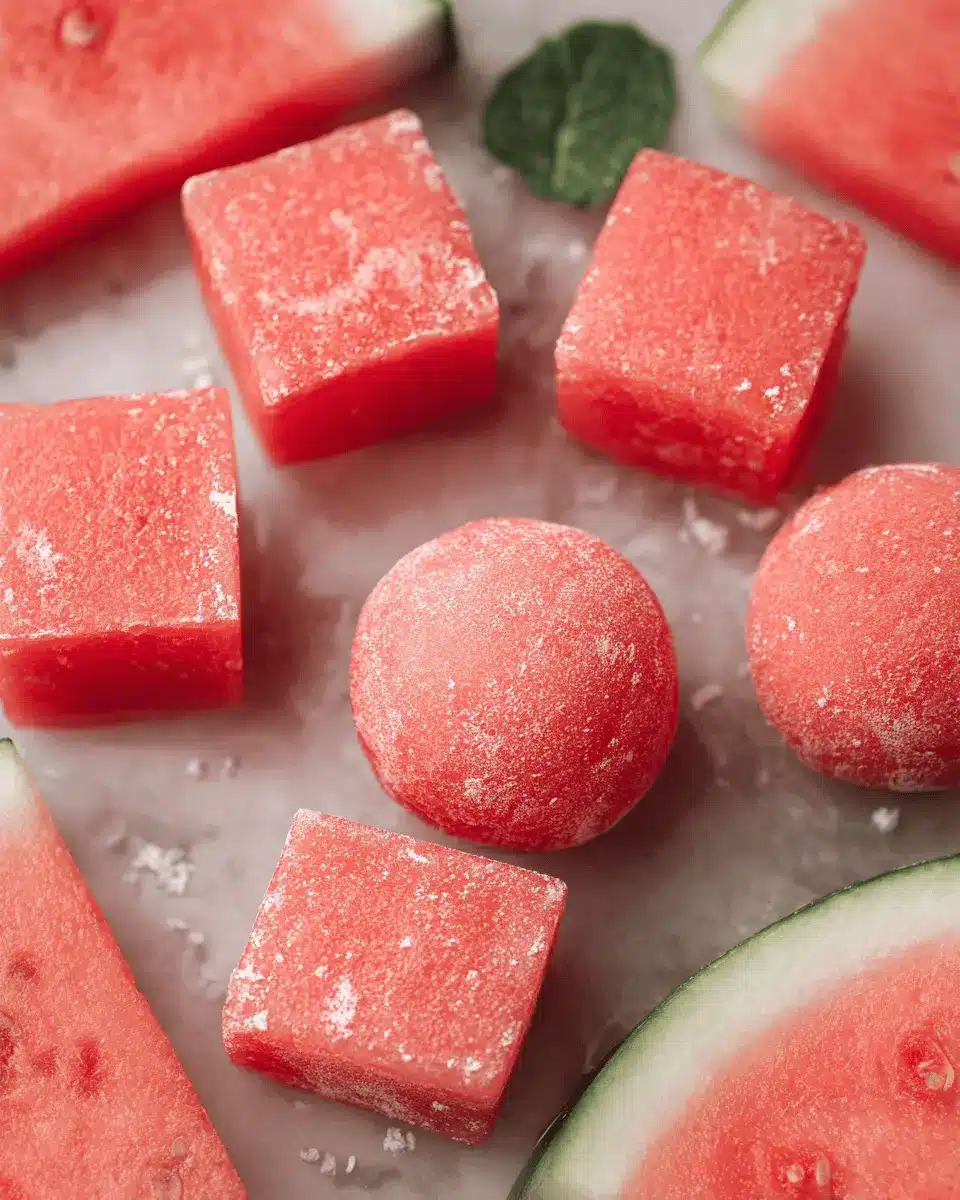
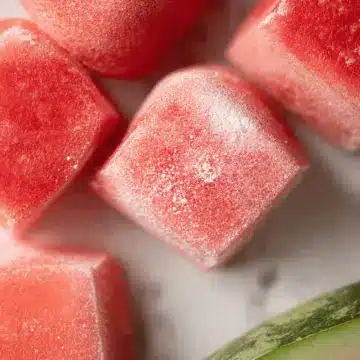
Cut and Dust the Mochi
After the mochi has cooled and set, it’s time to reveal your creation! Dust a clean surface with cornstarch to prevent sticking. Gently remove the mochi from the mold and place it on the dusted surface. Give the top another light dusting of cornstarch before using an oiled knife to cut it into 12 pieces. Make sure to coat all sides with cornstarch; this adds an extra layer of flavor and fun.
And there you have it! Your delightful watermelon mochi is ready to be enjoyed. Each bite is a burst of refreshing flavor—perfect for a snack or dessert. Enjoy the fruits of your labor, and don’t forget to share your experience!
Variations of Watermelon Mochi
Mochi with Different Fruit Flavors
While watermelon mochi is a delightful treat on its own, don't hesitate to explore other fruity flavors! You can easily swap the watermelon juice with fresh juices from mango, strawberry, or even lychee. Each fruit will bring its unique sweetness and aroma to the mochi. For a tangy twist, consider adding a splash of citrus juice—lemon or lime works wonders!
Vegan-Friendly Options for Watermelon Mochi
If you're looking for vegan-friendly options, this watermelon mochi recipe is a breeze! The key ingredients are already plant-based. Just ensure that the vegetable oil you use is refined and free from any animal byproducts. You can also experiment by incorporating nut milk or coconut milk for creaminess while keeping the mochi soft. This way, you can cater to a wider range of dietary preferences without sacrificing flavor. Remember, the versatility of mochi allows for endless creativity!
Looking for more tips or other mochi recipes? Check out Mochi Magic for inspiration!
Cooking Tips and Notes for Watermelon Mochi
Making watermelon mochi is a fun and rewarding experience! Here are some tips to ensure your mochi turns out perfectly soft and chewy.
-
Choose the Right Watermelon: Opt for a sweet, ripe watermelon for the juiciest flavor. Look for one that feels heavy for its size—this usually indicates high water content, yielding more juice.
-
Consistency Matters: While cooking the mochi mixture, consistency is key. Stir continuously to avoid sticking and ensure even cooking.
-
Dust Liberally: If your mochi is too sticky, don’t be shy with the cornstarch. It's your friend when it comes to keeping those pieces separate and easy to enjoy.
For more tips, check out this article on making mochi!
Serving Suggestions for Watermelon Mochi
Watermelon mochi is a versatile treat perfect for a variety of occasions. Here are some delightful ways to enjoy your creation:
-
Chill and Serve: Serve your mochi cold as a refreshing summer dessert during gatherings or picnics. The chewy texture pairs beautifully with warm weather, making it ideal for hot days.
-
Accompaniments: Pair the watermelon mochi with fresh mint or a drizzle of honey for added depth and sweetness. You can even consider a scoop of coconut ice cream for a tropical twist!
-
Creative Presentation: Cute individual servings enhance visual appeal. Try serving the mochi on small plates with berries or edible flowers for an eye-catching dessert.
-
Gift Ideas: Wrap your watermelon mochi in lovely packaging to share with friends or family. It’s a thoughtful and unique homemade gift!
For more serving ideas, check out this resource that offers suggestions on how to present mochi.
Time Breakdown for Watermelon Mochi
Preparation Time
Getting ready to make your watermelon mochi is a breeze! Spend just 5 minutes gathering ingredients and prepping your workspace. The sweet aroma of fresh watermelon will start filling your kitchen in no time.
Cooking Time
Cooking the mochi takes 15 minutes. You'll stir the mixture as it thickens into that signature chewy texture, and trust us, the wait will be worth it!
Total Time
In total, you're looking at just 20 minutes of active time before your delicious watermelon mochi is chilling in the fridge. After a little patience while it cools, you'll have a delightful snack ready to impress friends or indulge yourself!
For more tips on perfecting your mochi game, check out Serious Eats and Just One Cookbook for amazing insights into mochi and Asian desserts.
Nutritional Facts for Watermelon Mochi
Calories
Each serving of watermelon mochi contains approximately 70 calories, making it a light indulgence. This treat is perfect for a sweet snack without the guilt!
Sugar Content
With about 10 grams of sugar per serving, the sweetness of the watermelon juice shines through. It's a natural sweetness you can feel good about.
Fat Content
This delightful mochi has minimal fat, around 1.5 grams per serving, primarily from the vegetable oil used. It's a guilt-free option to satisfy your cravings!
Watermelon mochi is an excellent choice for those looking for a refreshing dessert. Want to dive deeper into the health benefits of watermelon? Check out the Nutritional Benefits of Watermelon for more insights!
FAQs about Watermelon Mochi
Can I freeze watermelon mochi?
Absolutely! Freezing watermelon mochi is a great way to enjoy it later. Just make sure to dust each piece with cornstarch beforehand to prevent sticking. Place the mochi in an airtight container, and it will keep in the freezer for up to a month. Just remember to let it defrost in the fridge for a few hours before enjoying.
What can I serve with watermelon mochi?
Watermelon mochi is delightful on its own, but it pairs perfectly with a variety of accompaniments! Consider serving it alongside fruity sorbets, or a light cream, such as whipped coconut cream. You could even complement it with fresh slices of watermelon or a refreshing mint tea to enhance the experience.
How long does homemade mochi last?
When stored in an airtight container in the fridge, homemade watermelon mochi typically lasts about 3 to 5 days. Remember that the texture may change slightly over time, so it's best enjoyed fresh! For detailed storage tips, check out this guide on Mochi storage.
Conclusion on Watermelon Mochi
In summary, watermelon mochi is an innovative treat perfect for any occasion. This simple recipe balances the sweetness of watermelon with chewy mochi, making it a delightful snack or dessert. Impress your friends with this refreshing twist on a classic Japanese favorite—it's sure to become your new go-to!
Watermelon Mochi
Equipment
- Blender
- fine mesh sieve
- bowl
- deep frypan
- spatula
- 12cm x 12cm square mold
- knife
Ingredients
Mochi Base
- 200 g Glutinous rice flour
- 65 g Granulated sugar
- 40 g Corn starch
- 240 ml Watermelon juice, strained
- 1.5 tablespoon Vegetable oil
Instructions
Mochi Preparation
- To make the watermelon juice place watermelon flesh in a blender and blitz until smooth, then pass through a fine mesh sieve to remove any pulp
- Combine the glutinous rice flour, sugar, and cornstarch in a bowl
- Add the watermelon juice and oil, and whisk until smooth
- Heat a deep frypan or saucepan over medium heat and add the mochi mixture
- Heat, stirring consistently, for 5-8 minutes, or until the mochi mixture thickens and changes into a dark pink translucent color (the mixture should be very sticky)
- Remove from the heat
- Prepare a 12cm x 12 cm square mold and line it with parchment paper, if you don’t have that size any small rectangular container should work
- Pour the warm mochi into the lined mold and press it down the the spatula to flatten it
- Place the mochi in the fridge to cool for 1-2 hours, or until slightly firmed up
- Dust your work surface with cornstarch
- Remove the mochi from the mold and place it on the dusted surface
- Dust the top of the mochi with more cornflour and cut it into 12 pieces of mochi with an oiled knife
- Separate the pieces and dust all sides of the mochi with cornflour
- Enjoy!

Leave a Reply