
Introduction to Cherry Blossom Cookies
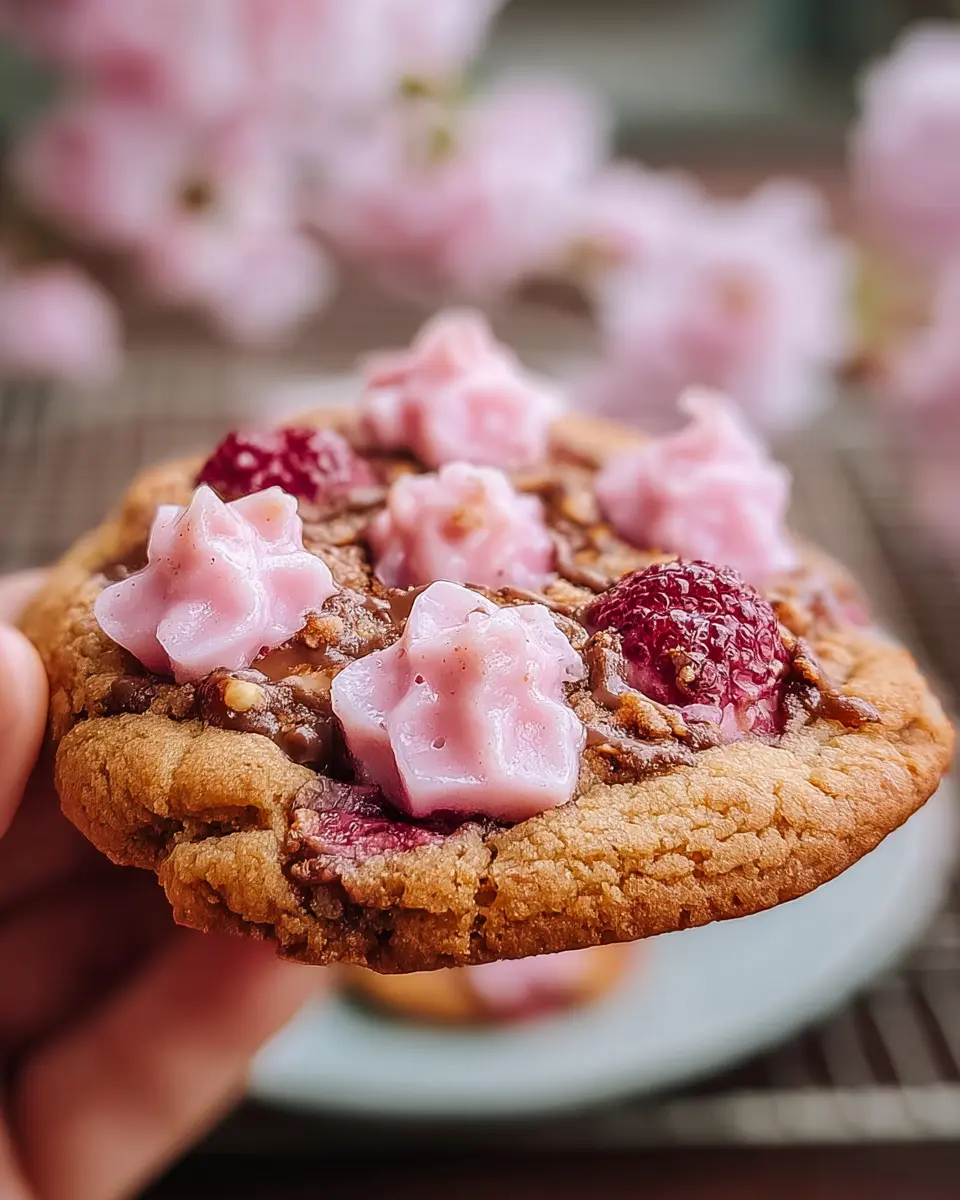
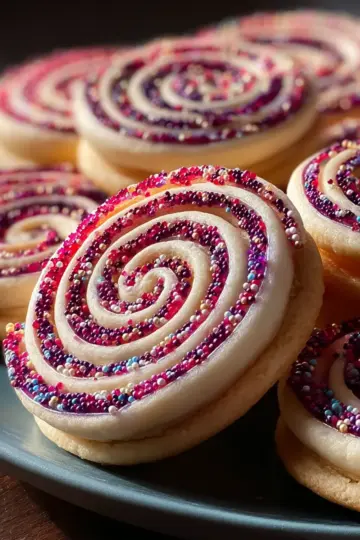
Cherry Blossom Cookies are more than just a sweet treat; they embody the vibrant spirit of spring with their delicate flavors and stunning presentation. What sets these cookies apart is their unique blend of almond and cherry flavors, inspired by the beautiful cherry blossom trees. These blossoms symbolize renewal and beauty, making them a fitting theme for a festive dessert.
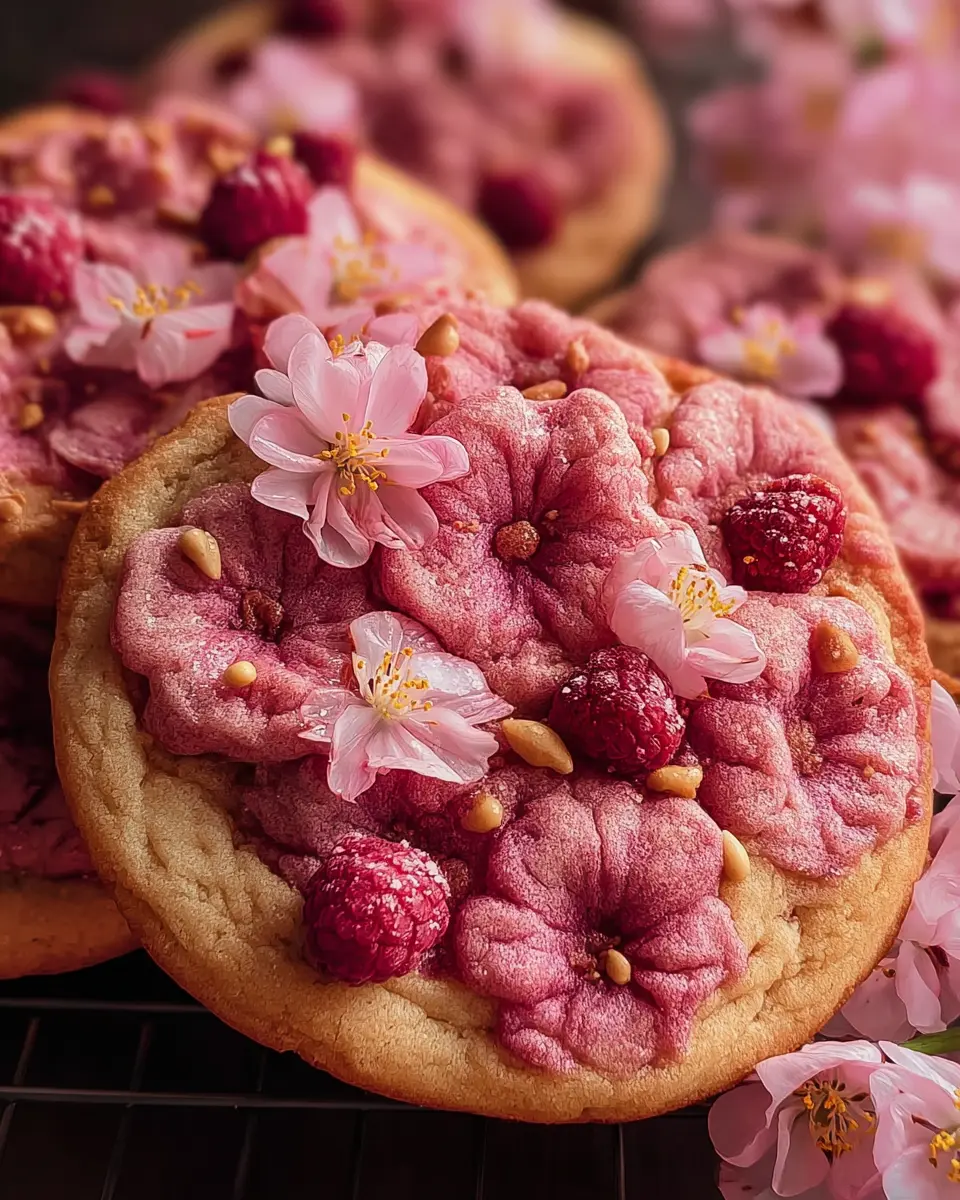
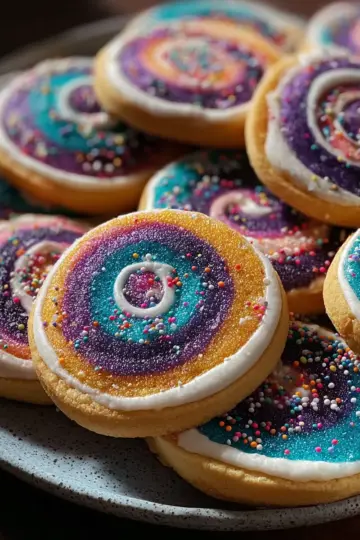
One of the standout features of Cherry Blossom Cookies is their gentle pink hue, often enhanced by a few drops of pink food coloring. This visual appeal not only makes them a joy to bake but also to share at gatherings or celebrate special occasions. In particular, the infusion of cherry juice or extract adds an authentic taste that complements the buttery base, giving these cookies a delightful twist that will have your guests asking for the recipe.
When you think about making Cherry Blossom Cookies, you’re not just creating a dessert; you’re crafting a moment. They’re perfect for a tea party, brunch, or even as a thoughtful homemade gift. With each bite, you'll experience a touch of spring bliss, no matter the time of year. Ready to impress? Let’s dive into the recipe!
Ingredients for Cherry Blossom Cookies
When prepping for your delightful Cherry Blossom Cookie creation, having the right ingredients is key! These basic yet flavorful components will bring your cookies to life and ensure they’re both visually striking and delicious. Here’s what you’ll need:
- 2 cups all-purpose flour – This is the foundation of your cookie dough, providing the necessary structure.
- 1 cup granulated sugar – Sweetness is essential, and this will help achieve that classic cookie taste.
- ½ cup unsalted butter, softened – A must for richness and that melt-in-your-mouth texture.
- 1 large egg – This binds everything together, giving your cookies the perfect consistency.
- 1 teaspoon almond extract – Adds a distinctive flavor that complements the cherry beautifully.
- 1 teaspoon vanilla extract – You can’t go wrong with vanilla! It brings warmth and depth to your cookies.
- ½ teaspoon baking powder – This helps your cookies rise to the occasion, making them fluffy.
- ¼ teaspoon salt – Just a pinch to enhance all the flavors.
- 2 tablespoons cherry juice (or cherry extract) – This is where the magic happens; it infuses the cookies with a delightful cherry flavor. You can find cherry juice options at Healthline for top quality!
- Pink food coloring (optional) – A fun way to give your cookies a lovely cherry blossom hue.
- Powdered sugar for dusting (optional) – To add a touch of elegance and sweetness to finish your cookies.
With these ingredients at hand, you’re ready to embark on your baking adventure! The combination not only creates a wonderful flavor but also evokes the beauty of cherry blossoms in each bite. Happy baking!
Preparing Cherry Blossom Cookies
Making Cherry Blossom Cookies is not just about baking; it’s an experience filled with flavor and creativity. These cookies are not only a delightful treat but also a great way to celebrate cherry blossom season. So, roll up your sleeves, and let’s get started!
Preheat the Oven
First and foremost, you’ll want to preheat your oven to 350°F (175°C). Preheating ensures that your cookies bake evenly, giving them that perfect texture we all love. Don’t forget to line a baking sheet with parchment paper; this makes cleanup a breeze and prevents sticking.
Cream Together Butter and Sugar
In a large mixing bowl, cream together ½ cup of softened unsalted butter and 1 cup of granulated sugar. Use a hand mixer or a sturdy wooden spoon to combine them until the mixture is light and fluffy. This step is crucial because it incorporates air into the dough, leading to beautifully soft cookies.
Add Egg and Extracts
Now, it’s time to add some moisture and flavor. Beat in 1 large egg, 1 teaspoon of almond extract, and 1 teaspoon of vanilla extract. Make sure everything is well combined, which will create a lovely foundation of flavor for your Cherry Blossom Cookies.
Mix the Dry Ingredients
In a separate bowl, whisk together 2 cups of all-purpose flour, ½ teaspoon of baking powder, and ¼ teaspoon of salt. This step is essential for ensuring your cookies rise properly. You may be curious—why separate the dry ingredients? It helps to evenly distribute the leavening agents, so you avoid any unexpected lumpiness in the dough.
Combine Mixtures
Gradually add your dry ingredients to the wet mixture, stirring until just combined. Mixing gently ensures your dough isn’t overworked, which can lead to tough cookies.
Add Cherry Flavor
Time to bring that cherry goodness into the mix! Stir in 2 tablespoons of cherry juice or cherry extract. You can also add a few drops of pink food coloring at this stage if you want that charming cherry blossom hue. This is what truly makes your cookies unique and gives them that irresistible cherry taste.
Shape the Cookies
Grab your cookie scoop or spoon to measure out tablespoon-sized portions of dough. Roll them into balls and place them on your prepared baking sheet, leaving about 2 inches of space between each. This space is critical as it allows the cookies to spread without merging into one giant cookie.
Flatten the Cookies
Next, gently press down each dough ball with the palm of your hand or the bottom of a glass. Flattening the cookies helps them spread evenly while baking, resulting in that ideal cookie shape.
Bake the Cookies
Slide the baking sheet into your preheated oven and bake for 10-12 minutes or until the edges are lightly golden. The aroma wafting through your kitchen will be absolutely heavenly—trust me, it's a highlight of the process!
Cool and Dust with Powdered Sugar
Once baked, allow the cookies to cool on the baking sheet for about 5 minutes. This allows them to firm up a bit. After cooling, transfer them to a wire rack to cool completely. Finally, dust with powdered sugar for that elegant finish; it’s like a little sprinkle of magic!
Enjoy your Cherry Blossom Cookies as a delightful treat for yourself or a charming gift for friends. Happy baking!
Variations on Cherry Blossom Cookies
Cherry Almond Cookies
If you're a fan of almond flavors, try adding slivered almonds to your Cherry Blossom Cookie dough. Not only do they provide a delightful crunch, but they also enhance the nuttiness of almond extract. For a unique twist, sprinkle additional almond slivers on top before baking. If you want to take it a step further, consider replacing a portion of the flour with almond flour for a richer, denser cookie.
Vegan Cherry Cookies
Embracing a plant-based lifestyle? No problem! Transform your Cherry Blossom Cookie into a delicious vegan treat by substituting the egg with a flaxseed meal mixture or unsweetened applesauce. Use vegan butter or coconut oil to keep the texture rich and indulgent. These adjustments make for a lovely, guilt-free option that’s still bursting with that cherry goodness we all love. Check out more vegan baking tips here!
These variations ensure you can enjoy your cherry blossom cookies regardless of dietary preferences. Happy baking!
Baking Notes for Cherry Blossom Cookies
Baking Cherry Blossom Cookies is a fantastic way to infuse a bit of charm and flavor into your day. To ensure your cookies turn out perfectly every time, keep these notes in mind:
- Temperature Matters: Always start with room-temperature ingredients, especially your butter. This helps achieve that coveted light and fluffy texture.
- Measuring Flour: Use the spoon-and-level method to measure flour accurately, preventing overly dense cookies.
- Customize Your Color: Feel free to adjust the pink food coloring to suit your aesthetic. A little can go a long way!
- Serving Suggestions: For a delightful touch, consider pairing these cookies with a cup of green tea.
For more cookie tips, check out this article on Baking Science that dives into the chemistry of baking. Happy baking!

Serving Suggestions for Cherry Blossom Cookies
Cherry Blossom Cookies are a delightful treat that beautifully complements a variety of occasions. Here are some serving suggestions to elevate your cookie experience:
-
Tea Time Delight: Pair these cookies with a warm cup of green tea or chamomile, enhancing their floral notes. This combination is perfect for an afternoon dessert or a special gathering.
-
Sweet Gift Idea: Package these cookies in a decorative box, and they make a thoughtful gift for birthdays or holidays. Include a personal note to make it even more special.
-
Dessert Platter: Serve your Cherry Blossom Cookies on a platter alongside other cookies or desserts to create a stunning dessert display. The contrasting colors will please the eyes as much as the taste buds.
For more serving suggestions and inspirations, check out sources like Epicurious and The Spruce Eats for related recipes and ideas!
Tips for Making Perfect Cherry Blossom Cookies
Creating the ideal Cherry Blossom Cookie is all about the details! Here are some handy tips to ensure your cookies turn out deliciously every time:
-
Choose Quality Ingredients: Fresh butter and pure extracts make a significant difference in flavor. Opt for high-quality almond and vanilla extracts for a richer taste.
-
Chill Your Dough: If you're short on time, this step can be skipped, but for the best results, chill your cookie dough for at least 30 minutes. This helps keep their shape during baking.
-
Keep an Eye on Baking: Since ovens can vary, start checking your cookies around the 10-minute mark. They should be lightly golden on the edges but still soft in the center.
-
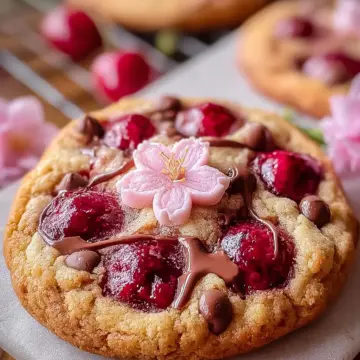
Experiment with Decoration: Feel free to enhance your Cherry Blossom Cookies with creative decorations! Add sprinkles, cherries on top, or drizzle some melted chocolate for a festive touch.
With these tips, you’ll be well on your way to baking delightful cherry-flavored treats enjoyed by friends and family alike! For more tips and delicious recipes, check out resources like The Spruce Eats or AllRecipes.
Time details for Cherry Blossom Cookies
Preparation time
Getting ready to bake these Cherry Blossom Cookies will take you approximately 15 minutes. This is the time to gather ingredients and whip up the cookie dough.
Baking time
Once the dough is ready, pop these sweet beauties in the oven for about 10-12 minutes at 350°F (175°C).
Total time
From start to finish, you’re looking at around 30-35 minutes to have fresh cookies ready to enjoy. Quick, right? Perfect for those last-minute cravings or gatherings! If you're looking for more quick recipes, check out this easy baking guide for more ideas.
Baking these lovely Cherry Blossom Cookies is not just a treat for the taste buds but also a genuinely fun activity. Who can resist the heavenly aroma wafting through the house? Happy baking!
Nutritional Information for Cherry Blossom Cookies
Creating delightful Cherry Blossom Cookies can be a treat for both the eyes and the taste buds. Let’s take a closer look at the nutritional information to keep your snack game on point!
Calories
Each Cherry Blossom Cookie contains approximately 130 calories, making it a sweet indulgence that won’t completely derail your efforts towards healthy eating.
Protein
With about 2 grams of protein per cookie, these cookies provide a small boost to your daily intake, helping to keep you feeling satisfied.
Sodium
Each Cherry Blossom Cookie holds roughly 50 milligrams of sodium, which is quite low, allowing you to enjoy a treat without worrying too much about your sodium levels.
For more in-depth nutritional analysis, you can check resources like the USDA FoodData Central for reliable information.
This balanced cookie can easily fit into a well-rounded snack or dessert option—just don’t forget to share! Enjoy your baking!
FAQs about Cherry Blossom Cookies
How can I enhance the cherry flavor?
To truly amplify the cherry flavor in your Cherry Blossom Cookies, consider using high-quality cherry extract or even fresh cherries if they are in season. A splash of cherry liqueur can also add a nice depth. Additionally, pairing your cookies with a cherry drizzle or glaze can elevate them further.
Can I freeze Cherry Blossom Cookies?
Absolutely! You can freeze your Cherry Blossom Cookies for up to three months. Simply let them cool completely, then store them in an airtight container or freezer bag. When you're ready to enjoy them, just thaw at room temperature or warm them in the oven for a few minutes.
What can I pair with Cherry Blossom Cookies?
These cookies are fantastic with a cup of tea or coffee. For a fun twist, pair them with sweet fruit teas or even a glass of milk. Consider serving them on a beautiful platter during gatherings; they are sure to impress!
For more insights on baked goods, visit Baker's Corner.
Conclusion on Cherry Blossom Cookies
Creating Cherry Blossom Cookies is not just about baking; it’s an opportunity to savor a delightful treat that brings joy to any gathering. Their delicate flavor and pretty appearance make them the perfect addition to spring celebrations or a cozy evening at home. Enjoy these cookies with friends and family!
Cherry Blossom Cookie
Equipment
- mixing bowl
- baking sheet
- parchment paper
- Whisk
- spoon
- Oven
- wire rack
Ingredients
Dry Ingredients
- 2 cups all-purpose flour
- ½ cup unsalted butter, softened
- ½ teaspoon baking powder
- ¼ teaspoon salt
Wet Ingredients
- 1 cup granulated sugar
- 1 large egg
- 1 teaspoon almond extract
- 1 teaspoon vanilla extract
- 2 tablespoons cherry juice (or cherry extract)
- Pink food coloring optional
- Powdered sugar for dusting optional
Instructions
Baking Instructions
- Preheat your oven to 350°F (175°C). Line a baking sheet with parchment paper.
- In a large mixing bowl, cream together the softened butter and granulated sugar until light and fluffy.
- Beat in the egg, almond extract, and vanilla extract until well combined.
- In a separate bowl, whisk together the flour, baking powder, and salt.
- Gradually add the dry ingredients to the wet mixture, mixing until just combined.
- Stir in the cherry juice and a few drops of pink food coloring, if desired, until the dough is evenly colored.
- Scoop tablespoon-sized portions of dough and roll them into balls. Place them on the prepared baking sheet, spacing them about 2 inches apart.
- Gently flatten each ball with the palm of your hand or the bottom of a glass.
- Bake in the preheated oven for 10-12 minutes or until the edges are lightly golden.
- Remove from the oven and let the cookies cool on the baking sheet for about 5 minutes. Then transfer them to a wire rack to cool completely.
- Once cooled, dust the cookies with powdered sugar for an elegant finish.
Leave a Reply