
Introduction to Gooey Butter Cake
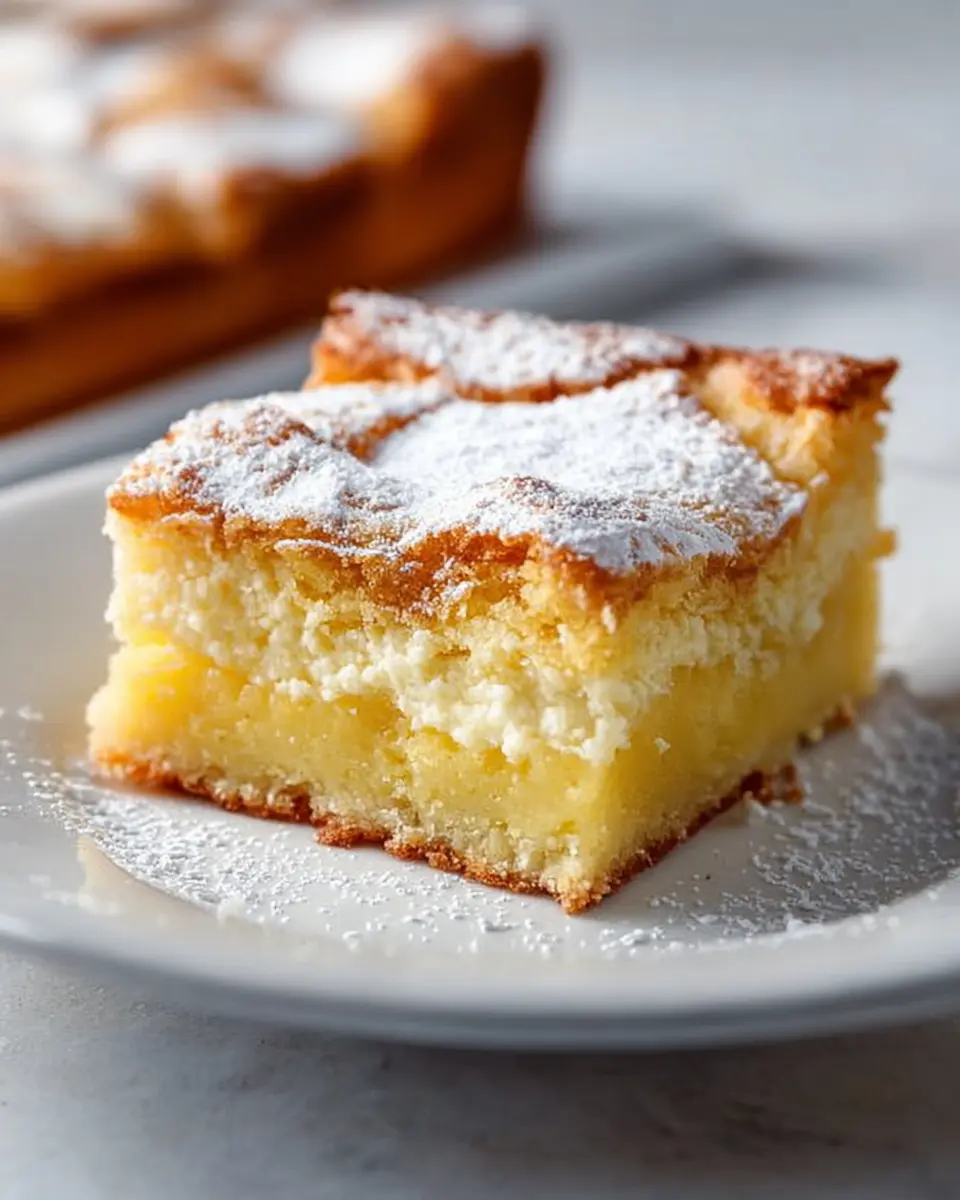
If you’ve never tried gooey butter cake, you’re in for a treat! Originating from St. Louis, this delightful dessert is uniquely comforting and decadently rich. It features a soft and chewy base made from a cake mix, layered with a creamy, sweet filling that makes it irresistibly gooey. Perfect for casual gatherings or cozy nights in, gooey butter cake is the kind of dessert that feels like a warm hug—easy to make and hard to resist.
Why is gooey butter cake the perfect homemade dessert, you ask? For one, it requires minimal ingredients and effort while delivering maximum flavor. You can whip it up in no time, making it an excellent option for those unexpected guests (or just because you deserve something special!). Plus, its texture is simply unique; that delightful chewiness paired with the sweetness of powdered sugar just elevates it to a whole new level.
To learn how to create this mouthwatering dessert yourself, check out the full recipe below. It’s time to impress your friends (and yourself) with this delightful creation!
Ingredients for Gooey Butter Cake
Creating the perfect gooey butter cake is all about balancing the right ingredients. Let’s break down what you need for this delectable treat!
Essential ingredients for a classic gooey butter cake
- Yellow cake mix: The foundation of our cake. A standard 15.25-ounce box works best.
- Eggs: You’ll need a total of three eggs—one for the crust and two for the creamy layer.
- Butter: Half a cup of melted butter provides rich flavor and moisture.
- Cream cheese: An 8-ounce package gives that characteristic creaminess and gooeyness.
- Vanilla extract: This one teaspoon adds warmth and deep flavor.
- Powdered sugar: A generous 3 ½ cups sweeten the cream cheese layer, creating that signature gooey texture. Don’t forget a little extra for dusting on top!
With just a handful of easily accessible ingredients, you're on your way to impressing family and friends with a gooey butter cake that’s simply irresistible. If you're looking for more tips on ingredient substitutions, check out this detailed guide from Serious Eats. They offer fantastic insight into ingredient functions and alternatives!
Step-by-Step Preparation of Gooey Butter Cake
Making a delightful gooey butter cake is not only a treat for your taste buds but also a fun and easy baking experience. Follow these steps, and you’ll be enjoying this classic dessert in no time!
Gather the Ingredients
Before diving into the mixing and baking, it’s essential to have all your ingredients ready. Here’s what you’ll need:
- 1 (15.25-ounce) box yellow cake mix
- 1 egg
- ½ cup butter, melted
- 1 (8-ounce) package cream cheese
- 2 eggs, beaten
- 1 teaspoon vanilla extract
- 3 ½ cups powdered sugar
Trust me; having everything prepped will make your baking process smooth and enjoyable!
Prepare the Cake Base
Start by preheating your oven to 350°F and greasing your 9×13-inch pan. In a mixing bowl, combine the yellow cake mix, 1 egg, and melted butter. Beat the mixture until it's smooth and creamy. This will form the base of your gooey butter cake.
Next, press the thick batter evenly into your greased pan. It should feel more like a soft dough than typical cake batter, so don’t be shy when it comes to using your hands or a rubber spatula to spread it out evenly.
Make the Creamy Topping
In another bowl, beat together the cream cheese, 2 eggs, and 1 teaspoon of vanilla extract until the mixture is creamy and smooth. Gradually add in the powdered sugar, mixing until incorporated. This luscious topping makes this cake so special—it’s what gives the cake its gooey character.
Pro-tip: If you’re looking for extra flavor, you might consider adding lemon zest or a splash of almond extract to the topping mixture!
Combine Layers and Bake
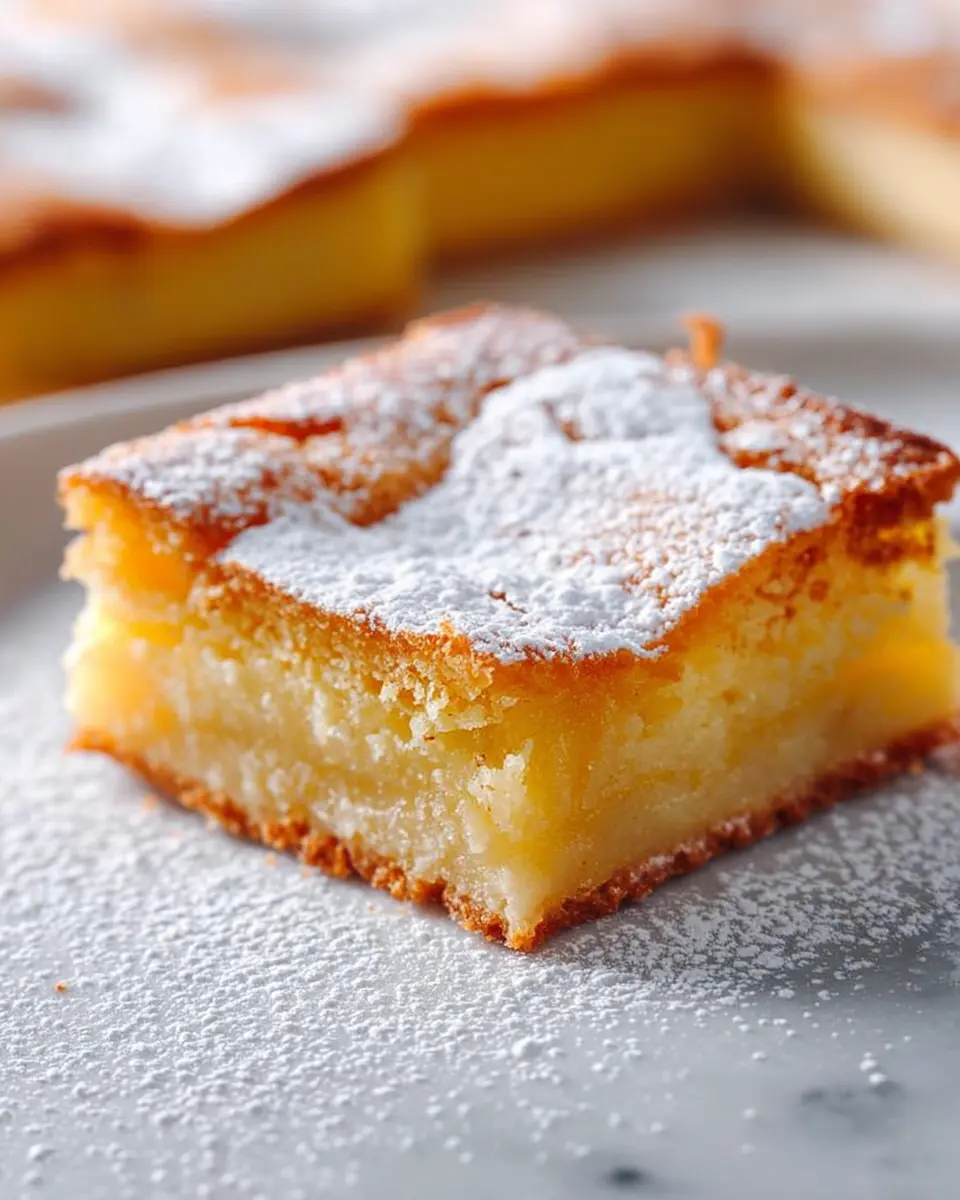
Now for the fun part! Pour the creamy topping over the cake base, making sure it’s distributed evenly. Pop the pan into your preheated oven and bake at 350°F for 40-45 minutes. You’ll know it’s time to take it out when the edges are golden brown, and the middle has a slight jiggle—this is normal for a gooey butter cake!
Let it Cool and Top with Powdered Sugar
Once you’ve removed the cake from the oven, let it cool for at least 30 minutes. The cake will firm up a bit as it cools. Right before serving, sprinkle a generous layer of powdered sugar on top. This not only adds a touch of elegance but also balances the rich flavors beautifully.
Now, slice yourself a piece (or two) and enjoy this delectable treat! Don't forget to share your gooey butter cake experience — maybe over a cup of coffee or tea for a delightful afternoon snack.
By following these simple steps, you’re well on your way to mastering this incredibly satisfying dessert! For more dessert inspirations, check out Baking Basics or Dessert Innovators for tips and tricks that can elevate your baking game.
Variations on Gooey Butter Cake
Gooey butter cake is versatile and can be customized to suit different tastes. Here are a couple of delightful variations you might want to try.
Chocolate Gooey Butter Cake
For chocolate lovers, simply swap out the yellow cake mix for a chocolate one. Combine ½ cup of cocoa powder into your cream cheese layer for that rich, chocolatey goodness. The result? A dessert that’s both gooey and decadently fudgy.
Berry Gooey Butter Cake
If you prefer a fruity twist, fold in a cup of fresh or frozen berries, such as blueberries or raspberries, into the cream cheese layer. This adds a refreshing burst of flavor, balancing the sweetness of the cake. Top it off with a sprinkle of powdered sugar for a perfect finish!
Curious about more variations? Check out this article for additional ideas.
Cooking Tips and Notes for Gooey Butter Cake
Tips for Achieving the Perfect Texture
To ensure your gooey butter cake has that irresistible, creamy texture, follow these handy tips:
-
Mixing Technique: Use a handheld or stand mixer to blend your ingredients, but be careful not to overmix. This keeps the cake light and prevents it from becoming dense.
-
Layer Thickness: The bottom layer should resemble a thick dough rather than typical cake batter. Press it evenly into the pan with a spatula or use a little olive oil on your fingers for easier handling.
-
Baking Time: Keep an eye on the edges; they should turn golden brown while the center remains slightly gooey. If you find the cake sinking slightly, that's part of the charm—embrace it!
-
Serving Suggestions: Consider topping each slice of your gooey butter cake with fresh berries. They add a lovely tartness that balances the sweetness beautifully.
For more in-depth baking strategies, check out this comprehensive guide on achieving the best cake textures!
Serving Suggestions for Gooey Butter Cake
Best accompaniments for your gooey butter cake
When it comes to serving your gooey butter cake, the right accompaniments can elevate this delightful dessert even further. Here are a few lovely ideas to enhance your cake experience:
-
Fresh Berries: Top your slices with a mix of strawberries, blueberries, or raspberries for a burst of freshness. The tartness of the berries complements the sweetness beautifully.
-
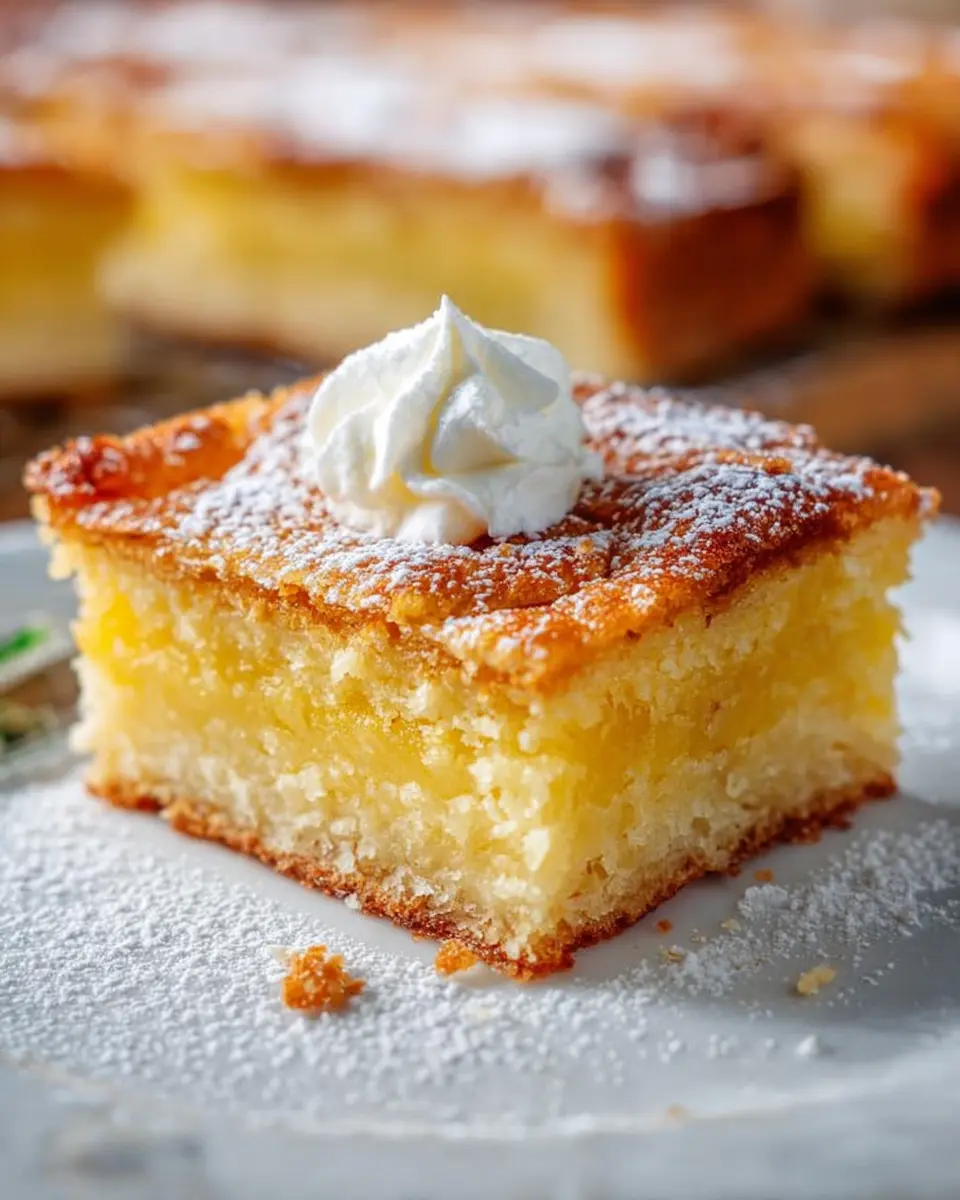
Whipped Cream: A dollop of homemade whipped cream adds creamy richness, making every bite even more indulgent.
-
Ice Cream: Pair warm slices with vanilla or a fruity sorbet for a delightful contrast in temperature and texture.
-
Coffee or Tea: Brew a strong cup of coffee or a fragrant herbal tea. The warmth of the drink can harmonize with the cake’s gooeyness.
Let your gooey butter cake become a centerpiece at brunch, gatherings, or cozy evenings at home!
Time Breakdown for Gooey Butter Cake
Preparation time
This delicious gooey butter cake requires just 20 minutes of prep. You'll mix your ingredients effortlessly, ensuring you leave enough time to enjoy the process!
Baking time
Once everything is blended and layered, pop it in the oven for about 40-45 minutes. You'll want to keep an eye on those edges turning golden brown!
Total time
From start to finish, you’re looking at about 1 hour to create this decadent treat. That’s just enough time to grab a cup of coffee and dream about how amazing the gooey butter cake will taste!
If you're curious about additional tips and tricks for versatility with this recipe, check out the Joy of Baking for adaptations that can elevate your dessert game!
Nutritional Facts for Gooey Butter Cake
Calories
One slice of gooey butter cake contains approximately 384 calories, making it a rich and indulgent treat for any occasion.
Sugar Content
With about 38 grams of sugar per slice, this dessert is on the sweeter side. It’s perfect for satisfying your sweet tooth, but keep moderation in mind!
Serving Size
Typically, a serving size is one slice, which allows you to enjoy the deliciously creamy texture without going overboard. Share with friends or save a slice for later to make it last longer!
If you're interested in learning more about the nutritional value of desserts, you can check out resources from the American Heart Association or the USDA.
FAQs about Gooey Butter Cake
What makes gooey butter cake "gooey"?
The signature "gooey" texture of this delightful cake comes from the combination of cream cheese and powdered sugar mixed into the batter. This rich filling creates a soft, custard-like consistency that contrasts beautifully with the denser cake layer underneath. The baking process ensures that while the edges get golden and slightly firm, the center remains perfectly gooey and indulgent.
Can I make this cake ahead of time?
Absolutely! Gooey butter cake can be made a day or two in advance, which makes it perfect for gatherings or meal prep. Simply bake the cake, let it cool completely, and then cover it tightly or store it in an airtight container in the fridge until you're ready to serve.
How should I store leftover gooey butter cake?
To keep your leftover gooey butter cake fresh, store it in an airtight container at room temperature for about 2-3 days. If you want it to last longer, you can refrigerate it for up to a week. For longer storage, wrap it tightly in plastic wrap and place it in the freezer, where it can last for 4-5 months. Just be sure to thaw it in the fridge before enjoying!
For more tips on perfecting this recipe, check out this handy guide on baking cakes.
Conclusion on Gooey Butter Cake
Making gooey butter cake today is an enticing choice! Its creamy texture and rich flavor make it an indulgent treat perfect for any occasion. Plus, the easy-to-follow recipe ensures that you can whip it up in no time. Trust us—once you try it, you’ll want to make this cake again and again!
Why You Should Try Making Gooey Butter Cake Today!
If you haven't experienced the deliciousness of gooey butter cake, today is the day to change that! Here’s why this delightful dessert deserves a spot in your kitchen:
- Easy Preparation: With simple ingredients and a straightforward method, you can impress guests without breaking a sweat.
- Rich Flavor: The combination of cream cheese and yellow cake mix creates a unique, buttery taste that’s hard to resist.
- Versatile Serving Options: Enhance every slice with a dusting of powdered sugar or fresh berries for that elegant touch.
- Perfect for Any Occasion: Whether it's a family gathering, a birthday, or just a sweet craving, this cake is always a hit.
Ready to dive into this delectable dessert? Embrace the joy of baking and treat yourself to a slice (or two) of heaven! If you love quick recipes with great outcomes, this gooey butter cake will not disappoint.

Gooey Butter Cake
Equipment
- mixing bowl
- 9x13 pan
- electric mixer
Ingredients
- 1 box yellow cake mix
- 1 large egg
- ½ cup butter melted
- 1 package cream cheese 8-ounce
- 2 large eggs beaten
- 1 teaspoon vanilla extract
- 3 ½ cups powdered sugar
- powdered sugar to sprinkle
Instructions
- Grease a 9×13 pan and turn oven to 350°F.
- Blend cake mix, 1 egg, and butter until smooth. Press into your greased 9×13 pan.
- Blend cream cheese, 2 eggs, vanilla and powdered sugar until creamy and smooth. Spread over your the first mixture in your pan.
- Bake at 350°F for 40-45 minutes or until edges are golden brown (middle may sink in a bit).
- Top with powdered sugar and ENJOY!

Leave a Reply